fbpx
Article

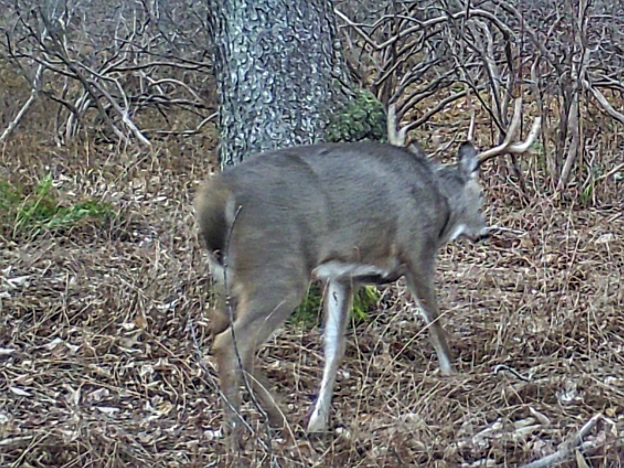
Glassing and Stalking Q&A with Josh Ilderton

One area eastern hunters are lacking is glassing skills. Almost everyone carries a pair of binos, but how often they get used is another story. 

I fall into this mold as well. Even though I carry a pair of Vortex 10×42 binos, they rarely come out of my harness. A deer sighting might entice me to take a closer look, but beyond that, my binos see more birds than deer. 

Josh Ilderton, from The Untamed, is an eastern hunter who knows how to handle his glass. Josh is a bowhunter who can get it done in just about any setting. He’s well versed in his skills as a woodsman, but in all honesty, I’ve not spoken with anyone that can glass up a whitetail like this guy. He makes glassing whitetails as easy as catching fish in a barrel. 

Talk about a killer; Josh can read a deer’s body language and knows when he should begin creeping in for a shot. I got to chat with Josh recently and picked his brain about some of his best advice. Here’s what he had to share with me and all of you.

Q: Josh, for starters, what type of glass would you recommend?

A: “The type of glass I use is related to the habitat I’m hunting. You can never be over-glassed. It’s all about what gives you the most confidence at that moment.”

Josh’s Spotting Scope: “A spotter would be my go-to for distance glassing. I’ll use them midday when I’m soaking everything in or if I’ve found a good deer and need to know more about him. Reading his actions or seeing details around him is challenging at long range. That’s why a spotting scope is always something I carry.” 

Josh’s Binocular Choices: “For binos, I use three types. A pair of 8×42, 10×42, and 12×50 are a part of my pack. I base my choice of the smaller binos on the cover I’m hunting, but I don’t discriminate too much here. The 12x50s I use on a mono-pod for distance glassing. Back to the spotter, I use binos first to find a deer, then switch to my spotter. Binos can be easier on the eyes and, therefore, more effective.” 

Q: How do you handle variation in terrain?

A: “Mixing up the terrain is challenging and keeps things fun. My crucial tip is to keep any moves slow and deliberate. It’s also important to flag the time of year. 

If I glass one deer in open country in the early season, I know many more eyes are looking back at me. Spotting a mature buck during the rut is different. There may only be one hot doe near that mature buck, but there will be a few wary bucks around the pair. Those satellite bucks will bust you fast if you’re not careful.

Now, big woods is unique. I might only glass short distances, but I move from point to point and keep the visual advantage in front of me. Glassing from an advantage means that I’m looking into a bowl, ravine, holler, draw; whatever you call it where you’re from, that’s what you should be using. 

Patience is the biggest factor when I’m glassing. I know I can’t just get up and move when I don’t see anything. If the deer are there, they will show. I have to keep that thought in the forefront of my mind.”

Q: What do you need to know before you begin a stalk?

A: “First, I need to know what that deer is telling me. What are his mannerisms? Is he timid, or is he looking for a fight? That body language will tell me how aggressive I can get.

Next, what is he doing? Did he bed down for the day? If he did, I’d watch him for an hour or so. A deer that only gets up to stretch will probably lay there all day, so I’ll close in for an ambush or to prep for an evening stalk.”

Q: What kind of wind and thermal advantage do you use?

A: “I don’t mess around with the wind. I’m constantly checking the direction with milkweed. I like the wind to be in my face most of the time, but a crosswind will do when I’m stalking a buck on the move.

For a distant deer, I need to figure out what the wind is doing at the location of the deer. I look at the vegetation around him like ragweed or whatever brush you see. Maybe he’s lying in swirling winds that give him a leg up from multiple directions. Use whatever resource you have to get as close as possible.

Another key we should talk about is the line of sight. I like to stay head-on to that buck. But the most important thing is to keep your eyes on him constantly. If he gets out of view, go to the last place you saw him cautiously. If you can’t see him from there, use your judgment. Read the terrain and cover to make sense of his course of action.”

Q: Josh, the obvious way to hunt deer, is out of a tree. Do you ever spend time in a saddle or a stand to glass?

A: “I do what I think is needed to kill a phantom buck. I wouldn’t say I like to sit much, but I will do what gives me the upper hand. 

Glassing from a tree is a great way to observe. But I’m not afraid to get down and start stalking if that’s what the condition needs.”

Q: How much success do you have with a spot and stalk?

A: “Aaron, it’s always different, but keeping a positive mental attitude is the only thing that will get you through a rough patch.

I probably fail 80% of the time, but there is nothing like being up close to a mature buck in person. That memory keeps me coming back for more. 

The times I find success are sweet, and you can’t beat them. It’s all about hunting the way I like, and I can always mix it up. I have to keep it interesting, but I’m ate up with whitetails and chasing them.”

More on Josh

I can’t say enough good things about this guy. He takes his whitetail hunting seriously, but he keeps it fun, and the man could make anyone laugh for hours. If you want to see more of Josh’s technique, check him out on Instagram@theuntamed, @joshilderton, or on his crew’s YouTube channel The Untamed Hunt.
Article

5 Piece of Gear Every Saddle Hunter Needs

Some gear on the market is nice, but some pieces are must-have. Saddle hunting has many of these items, far more than I’ll cover here. The best way to determine if a piece of gear is a “must-have”; it should cover a few bases. The kit must be legal, improve safety, save time, and improve comfort. An added benefit would include weight savings and making your technique more versatile.

There’s never a better time to carve out a new list than the present. Make your saddle kit exactly what you want it to be today!

Bow Hanger: A bow hanger is a pretty easy choice if you strictly hunt private land. Bring it with you and screw it into the tree, or better yet, buy a couple of screw-in hangers and leave them there.

One of the challenges public land hunters face is ensuring that their tools are legal. Some states may have regs that allow hunters to prune or screw things into trees, but it’s not many! In most states, making a hole in a tree or pruning branches on public land is illegal.

To combat this, Tethrd makes the HYS Strap to make hanging your bow on public land easier. I’m plugging this product because it’s the best option I have found for hanging gear on public land. There are plenty of options to attach your bow to the strap. Mine is to use a contractor’s Monster Hook, but Clint’s Do-it-yourself KYDEX bow hanger can’t be beat. Check out this video for more on Public Land Bow Hangers.

Ascenders: Ascenders may cost you a couple of extra dollars, but they are worth every penny. This gadget is a simple climbing device that enables you to adjust the length of your tether or lineman’s rope. Word of advice, use them to replace every prussic knot (except the prussic on your bridge).

These devices will shave time off your ascent and remove the hassle of adjusting your knot. Since they remove the need to use two hands, they can make your climb safer. Remember, they are mechanical devices and could fail, so consider the specs and check your equipment before use! If you want a cheap way to turn your regular prussic into a smooth one handed ascender…check out this YouTube video!

Climbing Aider: A climbing aider is one of the best ways to save weight and remain safe. An aider is a cable, rope, strap, or other material attached to the bottom of a climbing stick. They act as an extra step, getting a hunter higher into a tree without carrying more climbing sticks. Some hunters have an aider with as many as five steps, but the most popular is a single or double-step aider.

If you only want to carry two or three sticks and be in the 20-foot range all the time, aiders are the way to go. When using the one-sticking method, aiders are a must. You can check out the one-sticking method video here

Knee Rest: Hear me out. Maybe you truly are a stander or leaner. But everyone needs a break now and again. A knee rest is purely for comfort, but it can play a role in making you a better hunter.

I wouldn’t say that I always rest my knees against the tree. But when my body needs a break from leaning, using the tree for rest gives me the pep I need to stay longer.

There are a few choices for padding, knee pads are what I prefer, but a pad strapped to the tree works just as well for others.

A Practice Routine: A practice routine isn’t a piece of gear. But it’s the most crucial thing every saddle hunter should do. There isn’t a better way to save time, be safe, or stay comfortable than building a practice routine and perfecting it before being in the woods. This suggestion goes for most of your gear. But remember, when climbing a tree, you’re taking your safety into your hands. That might sound dramatic, but it won’t be when it stops an unwanted injury.

Learn how to use the gear, find the items that will work for you, then use them long before you need to climb a tree in the dark.

Summary

As far as legal, safe, comfortable, and time-saving criteria go, saddle hunting far exceeds any other elevated hunting and climbing method. Most falls from a tree occur during the climbing phase when a hunter is not attached. Saddles make staying attached to a tree easy and non-cumbersome. If you have a fear of heights, saddles also help to reduce that fear. With a tether and lineman’s rope, you can always feel your connection to a tree, unlike a harness with a small amount of slack.

You won’t regret the deep dive into the saddle-hunting world.

Article

Find Velvet Bucks To Kill October Bucks

The mad dash for velvet pictures has begun. Hunters are hanging cameras all over the place, excited to catch a glimpse of some epic bucks before they vanish. Summer scouting and camera work have two main reasons for the frenzy. Check out this podcast for some trail camera strategies!

One is to collect a census of bucks in the area. The number of bucks isn’t that important now, but what matters is knowing if bucks use a particular spot. When hanging from a saddle, prior knowledge of deer activity is the best confidence booster anyone can find.

The second reason for the velvet dash is that the burnout felt from last year’s season has faded, and there’s a drive to restart the cycle. The hunting crowd is chomping to get back at it, and some are counting the days until next season. Even as I write this post, a friend reminded me there are less than 100 days until the early Pennsylvania opener.

The beauty of summer velvet is that it scratches the cabin fever itch. But some hunters argue that little can be learned and applied from a group of velvet bucks. Those same bucks will break up and soon spread across a landscape. So how can summer scouting and velvet pictures benefit a hunter in October or November?

Most bucks, even mature ones, often follow a daily summer pattern. Many of those patterns dissolve as summer comes to an end. Linking known fall to summer traits is useful for patterning home body bucks. You’ll decode those patterns by taking notice of a few small clues from summer and painting them into a fall scene.

Food

One of the top warm-weather food sources is soybeans. Glassing fields or checking cameras around their edges is probably unmatched. But deer tend to disperse when soybeans begin to yellow. Around that time, beans mature, and white oak acorns start falling. The falling acorns create a change in deer patterns and habits.

The best way to use summer food sources is to hunt them while they remain pleasing to a deer’s taste. The first two weeks of a season are probably the best for killing a buck on an early-season food patterns.

If your scouting and hunting time is limited, don’t hang your hat on a single spot. Maybe you once saw a buck using an early-season food source. But that doesn’t doesn’t mean he will be there again next year. Give your effort the chance your time can afford but, don’t be afraid to keep moving when the action dries up! If you swore that buck would stay close by, but you were dead wrong, admit it. Then work hard to find that son of a gun!

Here we’ll use the term “full-range location” to describe a better option for hunting food sources. Compare it to people that like to shop at strip malls. They enjoy a variety of choices from grocery shops to sporting goods and even hardware stores.

Whitetails enjoy the same habits. The more options and habitat edges they can find in one spot, the more likely they will use the area into the fall months. If those soybeans have a crisscrossed pattern of fence rows, creek crossings close by, and adjacent woody browse, you might have a spot you could hunt through an entire season.

Scrapes

Think scrapes only heat up during the middle to end of October? Put a camera on one and find out! Most scrape action will occur during the last weeks of October and into the rut. But the science of whitetails is that buck movement continues to increase through the summer months. As fall closes in on the rut movement gets even more intense.

A random scrape in the middle of the woods probably won’t help you catch movement all-year long. Make thoughtful efforts to find what I refer to as “pot sweeteners.”

Pot sweeteners are the same idea as a free dessert paired with a restaurant’s special of the day. Some of the best are isolated water sources like a mountain spring water hole. Another is a scrape tucked into the thickest cover. Hang a camera in one of those places, or better yet, a blend of both. You’ll be surprised that they get action through all phases of the year and at all times of the day.

Bedding

Bedding is tricky because the areas that bucks use during daylight differ from summer to fall. If your cameras are near perennial foliage that provides good bedding cover, you may see an influx of pictures. As that cover begins to die off, so will a buck’s desire to bed in those places.

Hanging cameras in summer cover is good for fun velvet season and can help build an inventory of bucks. But with limited time, it’s better to stick to distinct bedding sites. That way, you can create a hunting plan to carry you through a whole fall.

The bed hunting style is no easy task. It’s better to view bedding areas through a long-term lens. Hang cameras in spots you believe to be used during both summer and fall. Learn from the patterns you’ll find over 2-3 years. While collecting intel, throwing a hunt or two at those sites won’t hurt. You might even hit it right and get lucky!

Tying it Together

The best way to understand a fall to summer pattern is to understand a fish using cover in a lake. As shallow-water plants grow in the spring, bass use those spots more often. But even when there is less aquatic plant life, a fallen tree will hold fish at all times of year.

Let’s say a fish uses a grassy weed edge in July. Poking into the weeds is a branchy tree that leads to the shoreline. You will likely find bass staged on that tree in the cold early spring months. As the grass grows and attracts baitfish, bass will head for the fresh cover. Still, they will sometimes use that tree as their home base. Fall begins, and that bass will be pushed back to the tree as cover as the grass dies off.

The idea is to follow the cover and find the bedding. Bucks will take advantage of new cover. They will stick close to secure locations they know best. Much like the bass that stays close to its home base tree.

The way bass use a lake can be far more detailed than I’ve described. Other factors include where the forage is staging and what depth the fish will prefer to be. Fish go where the bait is, so bass will follow bluegills to a cool creek mouth in late summer. More oxygen is there, and it’s kind of like a conveyor belt of food.

The forage seeking is the same as the soybean topic. Once the white oaks are falling, bucks will change course. But did you find a soybean field next to a great patch of white oaks on that new farm? That info could tell you how far you’ll need to go to find that buck again.

I think you get the gist of my bass analogies. Don’t solely respond to the velvet pictures you get this summer. Determine the intel that leads you to an overlapping pattern. But ultimately, you might not need to venture far from what you’ve found during velvet to be in the money!

Article

6 Pieces of Gear That Will Make You a Better Bow Hunter

The more time you spend in the woods, the more you will find that the magic bullet to hunting isn’t a bullet at all—it’s 100% hard work. Nothing will put a deer on your wall with more consistent results. Believe it or not, adding a hefty dose of physical and mental grind will, on top of yielding results, add a sense of pure satisfaction at the end of the day.

When you’re in the market for new gear, search with a purpose in mind. There’s a tool for every job, but the old faithful ones will often get the job done better than the latest gimmick.

For example, take a trip through the grocery store. You will find a veggie chopper, a mango slicer, a pineapple core tool, etc. But have you ever seen a talented chef using one of those tools? I sure haven’t. I have seen them use the sharpest knife they could find and use it with machine-like precision.

A good chef knows how to handle their tools. When you take the time to become proficient with your hunting gear, like a chef with Samurai-level knife skills, your results won’t disappoint.

Snapshot of my gear for travel hunts
  1. Boots

Forget what you heard about wearing rubber boots. They are trendy and all the rage in the world of deer hunting. The reasons for this trend usually have to do with thoughts around scent control. But if you haven’t had the pleasure, try wearing knee-high rubber boots on a long hike. Give them a whiff after that hike. Trust me, the idea that rubber boots help control scent will go out the window real fast. You will quickly learn that what you are losing in contact scent you’re likely doubling in wind-borne scent.

There are settings where the waterproof rubber boots simply outweigh their smelly shortcomings. Areas with swamps are a great example. Nothing compares to dry feet at the end of a long walk through a mucky wetland. Boot gaiters will hold up while crossing creeks most of the time. But in boggy areas, rubber boots serve their purpose.

I’m not trying to sell you high-end hunting boots. The pair I own certainly isn’t top-shelf. But boots should be breathable, comfortable, and durable. In most upland settings that involve a lot of walking, lightweight hikers are a suitable option for the mobile hunter.

Uninsulated boots are also a valid option. Check out our buddy from The Whitetail Experience, Byron Horton. He had the perfect idea when he cut a wool sock in half and put it around the toe box of his boot to serve as insulation. While nothing is stopping you from buying a pair insulated boots, this trick will take you through the beginning of November.

  1. Range Finder

I remember the days of stepping out twenty paces to a cardboard target. I would do this over and over until I learned to gauge the distance. Short ranges became easy to judge and even accurate.

Learning to judge distances is helpful, but mistakes often happen at ranges farther than twenty or thirty yards. Add an adrenaline rush at the sight of a deer, and the judgment hurdle will increase.

Sometimes a fast change-up is needed, so I encourage you to invest time in estimating ranges. But as for a range finder, there simply is no substitute. It’s a valuable tool in your pack and one you shouldn’t be without. Take it from someone who watched plenty of arrows breeze harmlessly under plenty of bellies before arrowing my first buck. It will save you plenty of heartaches.

Of course, it can be challenging to remember to range a deer as it enters a shooting lane. Dumb the encounter down a little by ranging obvious landmarks after you get settled into your stand. That way, when the time comes, you’ll have backup confirmation.

  1. Mobile Setup

Mobile hunting needs no intro on this page. It’s the most popular topic in the current whitetail space. Whether you hunt from the ground, a saddle, or a hang-on tree stand, it’s good to know what you’ll need for your hunting area.

These pieces of gear are the final touches that will get you close to an animal. Know them well, and they will serve you well. Take some moments during your scouting efforts to learn what you’ll need in order to blend into your surroundings. If hunting from the ground is your thing, then learn to build make-shift ground blinds quickly. Or better yet, carry a lightweight, portable blind that you can brush in with whatever is legal in the state you’re hunting.

  1. Binoculars

Glass in the field is a must-have. Can you hunt without it? Sure, but you will be missing a lot of crucial intel that you could be learning in live time. Seeing what deer are feeding on without disturbing the area can give you a leg up for your next hunt.

When I’m hunting, I carry a compact pair of binos that do that job and take up little space. As for scouting, I never leave my truck without a 10 x 42 or 12 x 50. There isn’t a more important tool for scouting. They are comparable to the job a birddog serves on a pheasant hunt. They work the landscape in front of you and flush everything out that you might otherwise walk past.

  1. Bike

Want a far-from-the-parking-lot adventure? Get a mountain bike! Take it from a guy who knows, they aren’t necessarily easier than walking, but they will get you where you want to go much faster. That matters a lot when you want to get way into the backcountry. It’s especially crucial when you want to pack a deer out and need to take more than one long trip.

Bikes serve a purpose for scouting when you want to bounce from one spot to another without killing too much time. It’s also easier to be stealthy on a mountain bike. Take a ride down a leaf-covered road and compare it to walking; you will make much less disruptive noise. The noise of bike wheels is confusing to deer and is also less startling than human footsteps.

  1. Milkweed

Milkweed is likely already a staple in your pack if you follow Truth From the Stand, The Hunting Beast, or any other public land-focused deer hunting platform. If it’s not part of your arsenal, and you don’t know why it should be, the explanation is simple: Deer use the wind to survive. You’ve done the work to find where they’re living, done the job to get close enough to kill one, and now you need the best advantage you can get.

A deer’s nose will keep that deer alive 99 percent of the time. Milkweed is your way of knowing if you can beat the odds and fool that deer’s nose. Throw a few pieces in the air, and you are now learning how to overcome the biggest hurdle for all whitetail hunters.

Use milkweed in the areas you scout and also while hunting. You will be amazed how often wind currents react to weather, foliage, and terrain changes. You will also learn to read a deer’s body language in reaction to those changes.

Not sure how to interpret thermals? Make sure you’re throwing milkweed every thirty minutes to an hour on every hunt until you’ve learned to solve them.

Conclusion

No piece of gear can replace hard work and time in the field. But with the proper application, equipment can give you the edge you need.

Many products promise to deliver deer directly down range of your bowstring. Those things are often too good to be true. Stick with gear that will complement and enhance your style, and you won’t go wrong.

Article

7 Turkey Hunting Tips

In most States, turkey season is underway. The Pennsylvania opener is closing in, and it’s time to tighten up the loose ends.

Let’s breeze through 7 quick tips to improve your PA Spring gobbler season!

Hunt Early

One of the best ways to put a bird on the ground is to hunt fresh birds. Do your best to hunt the opener and as many early days of the season as possible. Turkeys respond quickly to hunting pressure. They will move roosts, use different resting areas, and worst of all, stop gobbling.

Fresh birds are relaxed birds. That makes them more likely to fly off a roost into your setup. Pressured birds are likely to take their time and taunt you before committing to your calls.

Sneak Behind the Pressure

Roosted birds aren’t the easiest to surprise. Turkeys that hear abnormal noises below are likely to proceed with caution after fly-down. Other hunters are aware of this and use caution to sneak on a vocal tom.

Playing it safe on a roosted bird isn’t always a bad strategy. But if you want to kill birds, you’ll have to be ok with losing a few first.

Get aggressive! Go behind the hunting pressure when other hunters play it safe and allow him to enter an escape route. Block the access to the back door when that gobbler goes through it.

Hunt Late

Hunting later is a perfect way to find refreshed birds. After the first week of the season, gobblers are often unwilling to talk. A week of less hunting pressure will get those jelly-heads gobbling again.

Later in the season means hotter weather, more bugs, more snakes, and thicker cover. Those are all unpleasant details, especially for east coast hunters. Don’t give up; those last week birds are often the easiest to kill, and they’re often the best birds you’ll find all season.

Erase History

Turkeys are nervous critters, and small changes will affect them in a big way. Fallen trees or thicker cover will make them move elsewhere to search for living quarters.

That means the spot you killed a turkey last year will probably not be the place to look again. During your spring shed hunting and scouting, take note of things that might make a turkey leave the area. Also, note the changes that might block a bird’s response to your calls. Gobblers that hang up behind a barrier are the bane of a good caller’s existence.

Excited Calls

Soft, less frequent, and not calling are valid theories, sometimes required. But there are those of us who love to call. If that’s you, you’re likely overcalling, and honestly, that’s ok! Have fun because that’s what you’re hunting for in the first place.

If you like aggressive calling, figure out what level of excitement can fool a bird. It’s not very hard to get a turkey to gobble, but pay close attention to what makes him move closer to your position. Vary the sounds of your calls. Soft, subtle, loud, short, long; be like a hen on a roller coaster to the point that a gobbler can’t resist.

Fired Up Birds

These are the birds you want to find. When it comes to turkeys, arguing with one for more than an hour is beyond my attention span. Unless, of course, I think I still have a good chance of killing him.

Time in the field will tell you which birds are killable and which are not. Killable birds become excited quickly, almost charging your call. When seasoned birds respond, they often stop out of range and become silent. The silence can mean a few things; he’s strutting, spooked, or slowly creeping in.

The later bird will make you wait. But a fired-up tom will interrupt your calling while rushing in your direction.

Location

Finding a gobblers location is easy initially. We all know about shock gobbles, but they stop working after an adept tom has heard every owl hoot and crow caw known to man. Get creative; coyote howls, elk bugles, air horns, woodpeckers, duck quacks, goose honks, and hawk screams will elicit shock gobbles.

Remember, some of those sounds represent predators. Use predator sounds sparingly and never use them close to roosts or loafing areas. If you do, a turkey may only shock gobble once and become silent for the rest of the morning.

Non-threatening shock-type calls that a turkey isn’t used to hearing will likely bring a response consistently. That makes them a good choice for a run and gun-style turkey hunts.

Summary

Be aggressive while remaining safe in the turkey woods. You’ve got a lot to gain by losing a few times first. Most turkey hunting is trial and error. You’re likely to bring a bird every spring when you’ve learned the recipe.

Article

How to Find and Hunt Bucks Outside of the Rut

It’s April, and if you’re a whitetail fanatic, finding the first bucks about to premier in your neighborhood is exciting. While finding bucks outside of the rut isn’t a cakewalk, it’s not impossible. For more on finding early season bucks, check out the podcast in the player above.

Understanding the seasonal habits of deer is vital. Hundreds of opinions are written every year about what deer do at specific times. But easier said than done. You probably already know that locating bucks at this time of the year isn’t an exact science.

Take, for example, white oak acorns. They are the most predictable of early-season food sources and strongly influence deer behavior patterns. On their own, white oaks might not help you see more bucks. But add on appealing cover, water, or varied terrain features to those white oaks. Now you have likely found a site worth revisiting come hunting season.

What is the appeal in your area? Do bucks in your woods gravitate to a certain type of cover, like laurel thickets or patches of red briar? Get a head start and get creative with your questions and theories.

Below you’ll find a few tips to get you started.

Tender Food: Think about how you would want to eat in warm weather. You probably aren’t going to choose piping hot chili or soup. You’ll likely choose something lighter that won’t make you feel so sluggish in the heat.

Deer are the same way. They are chronic snackers, constantly browsing, especially in hot weather. Berries, briar buds, and tender maple shoots are on their favorites list, but don’t focus all of your attention on those food sources. Lots of different plants are starting to bud, which means browse is becoming more plentiful. Start checking the new growth in your area as spring begins to green up. Observing what is being eaten, and where, throughout the summer will predict the location of bucks on opening day.

It’s not that bucks won’t eat corn. But, they will much prefer random grasses that grow in waterways between those corn fields. Think light and green when it comes to food outside of the rut.

Backtrack to white oaks – never overlook them as a food source. However, consider treating sizable white oak flats like you would a big ag field. Of course, bucks will go there to feed. But bucks will feel more comfortable in daylight feeding outside these flats. The info is still helpful if the oaks aren’t in an isolated pocket. However, the staging area leading to that white oak flat is more likely to be a kill zone.

Camera Intel: Hanging cameras in early summer to mid-summer is becoming a more common practice, and understandably so. Everyone enjoys getting crisp pictures of big velvet bucks. But often, summertime trail cameras get checked far too frequently.

If you need frequent camera checks to keep you going through the summer months:

  1. Hang a camera on a field edge where routine checks won’t matter as much.
  2. Better yet, use a cell camera.
  3. Do what you have to do to stay out of prime hunting grounds until it’s actually time to hunt them.

Check your cameras once and at max twice. After the check, build your opening day plan of attack.

Weigh your options when hanging cameras in areas that could put deer on high alert. Consider settingcameras around the border of risky places. If you gain a good plan from those border cameras, check the sensitive camera when hunting that site. Fill in the gaps with the information you obtain and hunt according to the conditions that favor your hunt.

Earliest In-season Sign: The last thought leads me to the next and most vital part of finding bucks outside the rut—in-season scouting. In-season intel ties the last two elements together. Your intel needs to be able to predict the future. The freshest finds in the field will strongly influence that prediction.

Think of deer sign the way you think about early season food. A buck’s testosterone levels are comparatively low, which affects their communication and sign making. Small scrapes and the first rub lines on small saplings are more significant early in the fall than they would be if they were fresh during the end of October.

When you’re sneaking to that sensitive camera, note all the sign you pass along the way. Sometimes if you’re finding in-season sign at a regular rate, you probably want to consider putting the camera check on hold and checking it after the hunt.

The Evidence: This past season, I went to check a camera my hunting partner and I hadn’t checked all summer. I planned to hunt where the camera was hanging that evening. On my way to the camera, I passed a brand-new scrape near a white oak flat, right on the edge of the cover. After a quick review of the camera’s photos, I had a fleeting thought to backtrack and sit on that new small scrape. I chose not to and would soon live to regret it.

Thirty minutes before dark, one of my target bucks, a Pope and Young stud, came out of the cover next to that small scrape. Unfortunately, the buck never got closer to me than 80 yards. Some does came into view shortly after I spotted him, and the buck chased them up the mountain and out of sight.

Outlier Summary: Collecting intel is critically important. Ultimately, it’s be best if you have a good handle on the ebb and flow of the area you’re hunting. But, of course, you can’t know everything. No matter how much you scout, there still will be an element of uncertainty. For this reason, it’s safe to say that hunting bucks outside the rut is one part work and two parts trusting your gut.

Article

Top 5 Postseason Habits For Better Public Land Bow Hunting

Most of the deer bowhunters kill in the fall, are actually killed during their winter and spring scouting. This is especially true for public land hunters. The sooner you create positive postseason habits, the better your falls will become with more consistent encounters and filled tags. Here is my top 5 postseason scouting habits for better public land bowhunting – thanks for watching!

Article

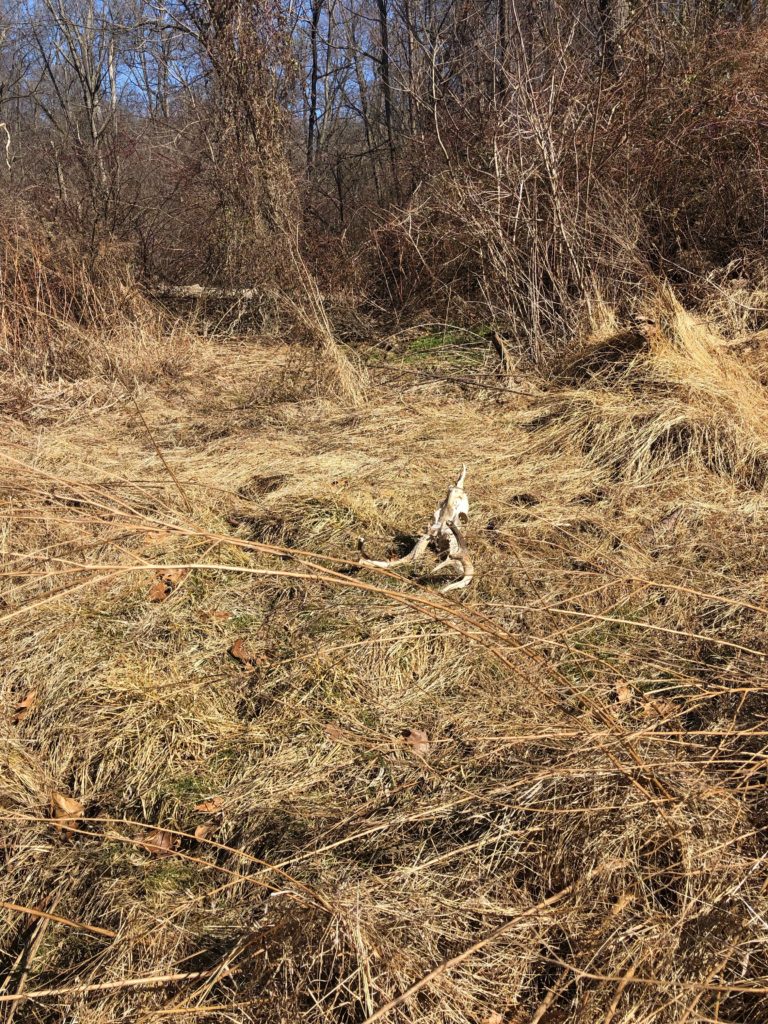
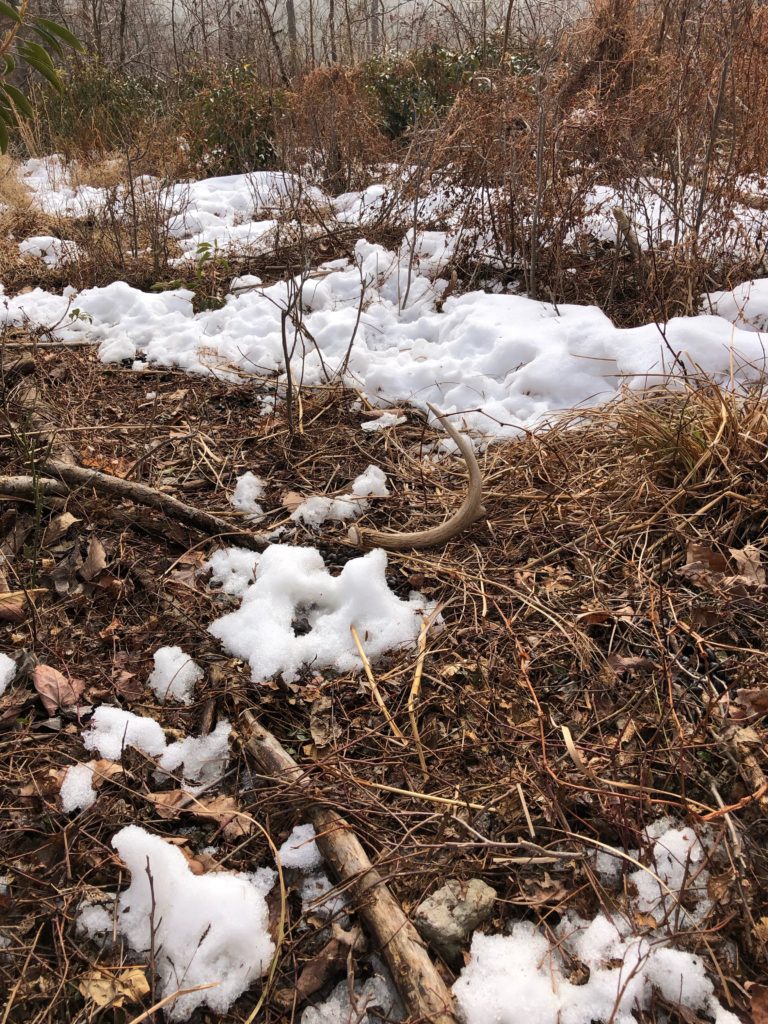
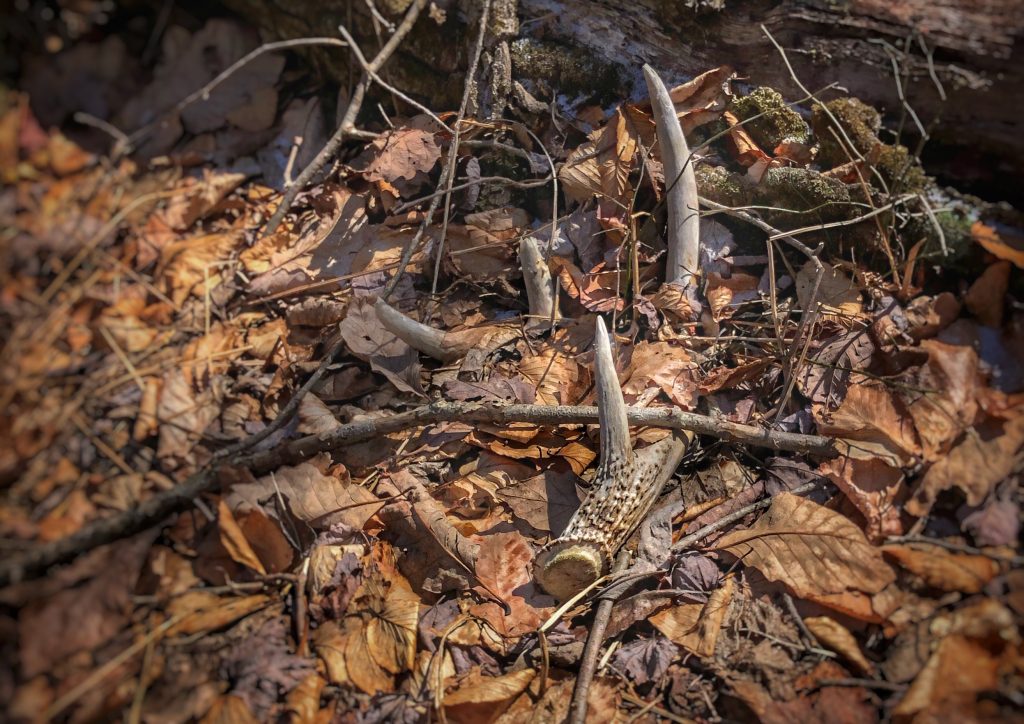
10 Rules of Shed Hunting

Ever have one of those adventures that begins with one objective but naturally shifts to another? It almost always happens to me, especially when I tell myself, “you’re going on this trip to look for antlers!” Usually, those sessions turn into full-blown scouting adventures. Waypoints of scrapes, rubs, trails, and beds rapidly begin to clutter my map.

If your goal is to combine shed hunting with scouting, go for it! There’s nothing wrong with killing two birds with one stone. In fact it may help you kill next year’s buck – check out this podcast if you want to hear more from Troy Pottenger on sheds. But if you want to get serious and find more sheds, then you’ll have to stay focused. And to stay focused, you’ll have to lay down some ground rules for yourself and follow those rules to a T while you’re in the field. Here are 10 rules that have helped put more antlers in my backpack:

  1. Mark high-odds waypoints and go to those waypoints on a bee-line! 

If only we knew where all the hot spots were, wouldn’t we already be going there? Probably, but you’re a hunter. It’s in your nature to have your head on a swivel and go to the next good-looking thing. 

If you have an e-scouted plan, stick to it! For example, high odds places would include fence or fence row crossings, peninsulas of woods or weeds jutting into a field, bedding ridge points, creek crossings, and outside edges of clear-cuts. 

Follow the Trails!

“Don’t leave fish to find fish.” One of my bass buddies tells me that ALL the time. The same goes for deer. If you’ve found the main deer trail on a long ridgeline, stay on that trail! Deer that are using it will keep using it, and at some point, there will be an antler or two to find.

 Keep your eyes roving and close.

Sounds weird, right? Don’t let your eyes wander too far, but keep them moving side to side. The exception would be when entering an open and short field. First, survey that scene thoroughly. Then, glass it and survey once more.

Never leave your glass at home.

A born and bred Pennsylvania hunter, I rarely find an opportunity to glass wide-open spaces—something hunters out West do routinely. But for shed hunting, I use binoculars constantly. More than once, I’ve thought something laying on the forest floor looked like an antler and realized from a distance that it was one! That’s not to say I haven’t glassed my fair share of “branchlers,” but hook-sets in bass fishing are free, and so are shiny sticks.

Pause to let your eyes rest. 

Ever stared at something for so long that it becomes a blurry image? If you haven’t, try staring incessantly at sticks, rocks, leaves, and dirt for an extended amount of time. 

Your eyes need a break to recalibrate now and then. Treat them well, and they will return the favor.

Target Cloud Cover.

Bluebird weather is inviting. But a drizzle with a bit of cloud cover will remove conflicting contrast. Sheds will be much easier to see, even from a long way off. 

Always take a photo before picking up the antler!

“As they lay” photos are trendy, but trendy isn’t the reason to snap a photo. When your mentor taught you to hunt, they taught you to look for flicking ears, a deer’s rump, and legs moving in the underbrush. They didn’t teach you to look for a whole deer: they taught you to look for bits and pieces. 

Do the same for sheds, and you’ll walk away with many more. Photos help create a search image and train your eyes to spot antlers like a hawk hunting a mouse.

Dissect Disturbed Ground.

Sheds are found every year by recognizing feeding sign. Have you found areas that look like they’ve been dug up and rooted? Use diligence checking those areas. 

Turkeys are most known for their scratching habits, but deer will tear through large swaths of ground in the winter. A quick tip: kick around in the debris surrounding the edges of these torn-up areas. Antlers will often be in the mix.

The 80/20 Rule.

When you get into the shed hunting scene, you will hear of the 80/20 rule. This rule means 80% of the sheds you find will be on 20% of the ground you’re searching. 

It’s an accurate rule-of-thumb, but how do you know in which 20% you should be looking? If you’re hunting big woods, stick to hard transitions. Edges of clear-cuts or where contour lines begin to get tight are your 20%.

The best thing you can do in big woods is to take long zig-zagging hikes before or after shed season. There may be critical transitions that you’re missing during your e-scouting sessions. It’s possible to miss hidden spots even during active shed hunts.

 Always Mark a Find.

Some shed finds are random or sparse. Eventually, you’ll find a spot that loads up at a particular time every year. Understanding when that time might be and having a good grasp of the location will put far more antlers in your pack.

Conclusion

The message I’m conveying to you is this: use these rules as a guideline, but tailor them to fit your skill and style. When you figure out your regimen, kick your shed hunting seasons off with good habits. 

Article

Advanced Access Strategies For Better Deer Hunting

The average bowhunter spends a significant amount of time thinking about the factors that go into a hunt. Shot placement, stand setup, clothing to match the conditions, and intel from a specific location. All those things matter, but don’t forget your access plan. Navigating the best access points far before the season will help you enter the woods with total confidence. 

Access planning is crucial. However, it’s frequently forgotten until the night before or the morning of a hunt. Flexibility and rethinking a plan on the fly are good skills. But having a foundation will eliminate errors. 

Be creative! Deer adapt well to living with people, so out-hiking the competition isn’t always a solution. You may need some ideas to start, and these might get the creative side of your brain turning. And if you need a little extra juice, check out this podcast all about access

1. Early Season

Some states have bow seasons that open in early September. But early October openers also follow early-season patterns. Muggy, buggy, and thick are all common themes. It’s a good idea to utilize recreational trails this time of year. Exit the main trail, then approach your hunting location directly. Zig-zagging will leave a much higher scent signature because of spreading your odor over a greater area.

Consider re-evaluating access with sparse cover during the summer. Doing this will help you avoid being surprised by regrowth that may obstruct your travel.

2. October Lull

Proven evidence shows that deer activity increases through the fall months, debunking the October lull theory. Food sources change, causing deer to wander randomly. The herd then spreads across a broader landscape. Deer enter a fall transition stage. Bedding and feeding will be similar to a late October pattern. Still, some deer will be feeding and bedding like they did in early October.

Using ditches, creeks, or whatever low spots you can find is a good strategy. Also, take notice of debris like fallen trees and large rocks. They may obstruct your path and make navigation difficult when it matters most. 

3. Pre-Rut

Bucks are beginning to use the most desirable terrain for bedding. The sign that was moderately fresh during your post-season scouting trips is now the target. These are the bucks you’ve captured on camera and the ones you’ve probably been hoping to encounter. 

While waiting for ideal weather (i.e., cold fronts) is a plus, deer are still moving. Don’t talk yourself out of hunting if you have the time to go! 

It may be necessary to arrive at your destination an hour early to avoid kicking a buck out of his bed. Knowing how the deer activity has been in your area may indicate how early you should arrive at your stand.

4. Rut

Deer activity is erratic, but it doesn’t mean your access should be. Early morning access won’t matter as much here because you will often be sitting on travel routes. When planning your access route for the rut phase, ensure that you’re not crossing scent over a trail that a mature buck might use to chase does. If crossing a travel route is unavoidable, this would be an excellent time to apply a cover scent. Synthetic spray estrous urine, or even scent-killing aerosol, can help.

The rut is also a great time to access old logging roads or drainages to still-hunt. This method has an advantage because you can actively respond to what deer are doing. You can also have the benefit of real-time wind and thermals.

Utilize Barriers

At the beginning of this article, I stated that it’s not always about out-hiking the competition. We’re a lot alike if you go as far as your legs can carry you. But that’s more for pure enjoyment than it is about outsmarting a crowd and a big buck. It is essential to determine what barriers will place you apart from other hunters. 

1. Water

Water utilization for access used to be an easy way to get away from a crowd, even if it was by using knee-high boots. In this day and age, decreasing the likelihood of someone being where you want to go may require the use of a boat, kayak, or chest waders. That said, water is still an excellent access barrier.

2. Hills

The size of the hill may not matter to many hunters. Big bucks have significant drawing power. The general hunting crowd will be apt to work harder than you think. Consider the slope when using a hill or mountain as a terrain barrier. The steeper the incline, the better. You won’t outwork the willingness of someone else who loves to hunt. But you might outwork their stamina.

3. Undergrowth

Heavy cover is a shared feature of the most commonly overlooked locations closest to parking areas. Maybe there’s a dumping area nearby; perhaps new cutting has thickened the area. But the thing about heavy cover close to parking is that it doesn’t look like a location deer will likely use. Regardless, we still hear about these areas producing big bucks for new hunters. Undesirable doesn’t always equal unhuntable.

Article

How To Find Sheds & Learn more about Mature Buck Habits

I’m not alone in saying the next best thing to hunting whitetails is finding their antlers. If shed hunting isn’t on your calendar, you’re missing out. It’s the perfect springtime activity to combat couch potato blues. More importantly, shed antlers can bring you closer to understanding the keen minds of mature bucks. 

Hunting antlers will take you to the hidden places you always consider going to but never do. The locations left untouched are the places that can reveal the secrets of the woods that are crucial for your future hunts.

You’ve already seen what you assume deer are doing. But will they always follow the same script? That’s a million-dollar question. Shed hunting is one of the best ways to find the answer.

Post-season Scouting

Consistently successful public land bowhunters have one major thing in common— they obsessively scout. If it pays to scout deer for hunting purposes, why not scout to hunt their antlers? 

Public land is an arena for my good friend and whitetail expert, Tony Peterson. If you don’t know much about him, I’d suggest googling “Tony J Peterson” and checking out his resume. He is truly a guru. From contributing to just about every hunting publication to writing his book “Bowhunting Public Land Whitetails,” he’s been part of it all. 

Beyond whitetails, Tony’s other passion is bird dogs and upland hunting. Shortly after the year-end holidays, while everyone else’s hunting seasons are coming to a screeching halt, Tony gets to work with man’s best friend. His two black labs hit the road with him on adventures that bring them straight into the heart of prime whitetail territory.  Listen to dog trainer Jeremy Moore talk about shed dogs and how they help you become a better deer hunter.

Upland bird hunting may not seem related to the discovery of shed antlers, but believe me, there’s a connection. During a conversation with Tony, he told me, “I love bird hunting this time of year. There’s nothing better to get you into the places whitetails want to be. Birds aren’t where people go; neither are whitetails.”

You may have heard the term “the path of least resistance.” In the context of hunting birds, Tony stays as far from that path as possible. He describes the landscape and terrain as nothing like the type conventionally used by whitetail hunters. But the whitetail knowledge that Tony and his hunting partners have gained from trekking to those non-traditional tangles is outstanding. Deep bogs, tangled grasses, cattails, and areas almost devoid of climbable trees—half the country’s whitetail fanatics wouldn’t be caught dead wandering around in them. 

Preseason Scouting

Tony’s primary stomping grounds are in Minnesota and Wisconsin. Those particular mid-western states seem to be in perpetual winter. While deep snow cover doesn’t lend itself well to finding sheds, Tony utilizes creative options. He says, “Snow patterns here vary a lot. My strategy around snow is to spot-check the places I’d like to scout after the spring thaw. Sites with active concentrated deer sign might bring me back for a return trip later in the year if I like the trending intel.” 

Tony focuses his attention on the locations he finds where deer are yarding: “It’s easy to tell where deer want to be when you’re looking at their tracks in the snow. Look for those pounded trails, follow them to the food sources in the area, and make sure to mark those waypoints for return trips. If you’ve done your homework and apply what you’ve learned from scouting in the snow, you will have a real good idea of how to find their antlers.”

In-season Scouting

Shed hunting isn’t impossible in the snow. But if you’re a newbie, be advised that unless the antlers have recently fallen, they’re tough to find. For public land shed hunting, Tony feels that heading to the woods under particular conditions and on specific days of the week can help lead to success:

“Finding sheds in the snow is tough. Although you might run into one that’s a freshie, most antlers will be under that snow. For most of my public land shed hunts, I target Thursdays and Fridays. I run into fewer people those days, and deer have had the opportunity to slide back into their typical patterns before weekend warriors get back after it. If you give Thursdays and Fridays a try, line those days up with the first groundbreaking snowmelt, put in some practice, and you’ll start finding more sheds.”

Shed Hunting Advantages 

As it relates to deer hunting in October, some whitetail experts are on the fence regarding whether or not finding shed antlers speaks to deer habits in the fall. If you can locate their antlers, then you’ve gained a piece of understanding. You’ll now know where that deer lives for at least some period. You also might be able to connect the dots to understand his whereabouts further. 

I asked Tony his thoughts and if he believes that finding sheds relates to better hunting. His answer surprised me. 

“Yeah man, it’s all the same thing! I’ve kicked up giant public land whitetails when I’m bird hunting. Every time I wonder, ‘What in the heck was that deer doing there?’ But they live in those places, and they walk through them every day. They know where to go to avoid people. Bird hunting and explicitly looking for shed antlers give you a glimpse into a buck’s everyday life. The type of stuff bucks prefer almost seems more appealing to a rabbit than a deer. But when you’re following a trail without boot tracks, get down on your hands and knees; it will be one of those ‘ah-ha’ moments. The deer sign you will see will blow you away, and it might be your time to turn up the best sheds you’ve had the opportunity to find.”