fbpx
Article

5 Big Woods Scrape Tips

There’s never a time when I see the first newly opened scrape of the year and don’t get excited. It’s just one more sign of fall and one more sign of life. At the very least, that scrape means that a revved-up buck happened to pass through the area. It may or may not mean much more than that. While scrapes all serve a purpose as a form of communication, they are not all equally weighted in their significance. Twenty years ago, a moderately sized scrape got a scrape scent bag-dripper and a tree-stand hung within shooting distance.  Ten years ago, hunting scrapes fell out of favor with the belief that bucks use scrapes almost exclusively at night. In today’s day, we know that scrapes are important components in patterning deer movement and can, in fact, have many different meanings. Finding the right meaning and setting might just be the ticket to putting a daylight bruiser in the back of your pickup.

  1. Scrape Patterns: The scrape you found in the middle of open hardwoods, during your spring scouting missions, may be one of those that lacks significance, or it might be an important piece of that big buck puzzle. It’s your job to figure out which one it is. If it appears random and all alone, maybe it is. Or maybe you need to walk a circle with that scrape as the center point. Is there another scrape that seems to be related? If so, continue trying to connect the dots (scrapes) together. When your circle leads to thicker cover, you’re on the track to a more meaningful and productive scrape. Get as close as you think you can to where typical deer travel originates (hint: keep an eye out for beds). It’s not necessary to hunt directly over a single scrape, as a pattern targets a travel route. Make your ambush between scrapes in an area that provides the best available cover.
  2. First Scrape Zone: The first scrapes that tend to show up on tractor lanes and field edges usually don’t hold much weight. They were probably made by a buck just letting off some steam due to increasing testosterone levels. But, what if you find new scrapes in a patch of thick beech or hickory trees and some kind of less attractive understory? Is there a stand of white oaks across the street that a buck is heading for next? Knowledge of where first scrapes pop up is useable information. They’re likely not what you think and are probably more related to the food that’s available early on. Match the two and you could have a spot that yields productive sits.
  3. Buck Bedding Scrapes: Buck bedding scrapes are most often found in the big woods. The key to discovering a scrape like this is to find a buck bed above its location. Generally, a single-destination deer trail will lead from the bed to the scrape. More often than not, that scrape will be in view of the buck’s bed. Focus your efforts here during last few days of October and the first few days of November. Ideally, you’ll want to position yourself for a shot in 1 of 3 places: within shooting distance of the scrape, above the elevation of the bed, or within shooting distance of the trail that leads from the bed to the scrape. Choosing a spot should be determined by wind direction. A wind blowing perpendicular, away from the trail, is the easiest to hunt. It provides the most shot opportunities and potentially allows for shooting to the bed as well as the scrape (pending distance, of course). Bucks use these scrapes in their downtime in the early part of the pre-rut to rest and catch traveling does at the same time. Another hot timeframe is during the heat of the rut, revolving around that mid-day period.
  4. Ditch Hopping Scrapes: When a ridge bends, it typically creates folds in the terrain that form a series of secondary points. The more difficult these points are to see via topo maps, the better they will be to hunt, as it will attract less traffic from other hunters. If you’ve taken the time to walk the bends in ridges during the off season, you’ll realize how pronounced these points can be without being immediately apparent. Of course, bucks use the series of points for bedding from time-to-time. But, a series of points like this provides battle-like concealment, an easy escape route, and all the while bucks can scent check the route for hot does. The bottom of each ditch between points is a good place to keep your eyes peeled for these scrapes. Ditch scrapes are traveling scrapes, so you shouldn’t expect a buck to stop for a long period of time on one. However, if you miss your opportunity on a buck’s first pass, don’t be surprised to find him back at that same scrape a few hours later.
  5. Hillside Bench Scrapes: Hillside bench scrapes are the toughest to hunt due to the fact that winds are generally inconsistent in these areas. They are perfect locations for cameras, as you’re likely to get the biggest buck in the woods on a secluded bench, but hunting them may cost you. If it’s a spot you’re thinking of throwing a hunt at, then be as aggressive as possible. Timing should be a consideration. Less foliage with wind paralleling the ridge is the best bet, but every piece of country is different. Make sure you know what a specific wind will do in your target spot. Scrapes tend to lose a little bit of luster in the peak of the rut, but often during the post rut time frame they may get pretty popular again. This is a very good time to hunt the hillside bench scrape. Bucks will be responding to the increased hunting pressure and looking for the most bulletproof seclusion they can find. Tie this into your late season plans and it could mean a full year of hunting scrapes exclusively.
Article

5 Overlooked Whitetail Food Sources

Don’t Miss Out on Off-label Food Sources

Operating solely on early-season data from the 2019 bow season, I sat perched on an inside corner of a 5-year-old clear-cut. I hoped that if and when history repeated itself, I’d find myself on a 3-mile pack-out with an opening day buck. The time was about 3 p.m. when I settled into my hang-on style tree stand. I was pleasantly surprised that it didn’t take long before deer began filtering in and out of the clear-cut. Around 4 p.m. there were quite a few does milling around and browsing on tiny oak shoots. Encouraged by the fact that I was on public land and already covered up in deer, my anticipation of getting an opportunity at a good buck grew. Because the cut was rather thick, deer seemed to be appearing out of thin air. Quietly and out of nowhere, a shooter buck came into my line of sight well before those last special minutes of light. Browsing at 65 yards, the buck began working his way in the direction of a bean field away from where I was sitting. I grunted at him in an attempt to entice him my way, but other than one short look in my direction and hesitation to move straight for the field, the buck wasn’t very interested. Before that buck left the scene for good, he worked his way into a patch of pokeberries, spending a good chunk of time gorging himself on the ripe fruit and rubbing plenty of salt into my wound. I was that much closer to X marks the spot, but I learned about one key element that I hadn’t paid much attention to before. That element is off-label food sources.

Mass crops are the talk of early-season town—for good reason. Deer love acorns just about as much as, if not more than, any other food they consume. In the early season, it’s never a bad idea to find isolated white oak stands. These destination food sources still have a place and will pay off. However, when we’re talking about pressured bucks, or trying to find some kind of overlooked staging area, it’s important to hone in on some unconventional food sources.

  1. Chestnuts. Productive chestnut trees aren’t super common in the big woods and often are done dropping well before the season opener. If you’re lucky enough to find a tree that’s still productive during the opening week, hunt it ASAP! That crop will not be likely to last very long. Better yet, if you can find one or two productive trees tucked deep along a hard ridge-line, they could provide a perfect early-season funnel location to catch a buck moving from its bed to a main food source. Hunt these during the opening week if possible.
  •  Osage-oranges (AKA Hedge Apples). Although not a huge favorite, Osage-oranges could be useful as a staging food. I sometimes find Osage-oranges near field edges. But more often I find them along creek beds. When other mast trees are scarce, Osage-oranges become increasingly important. Deer that use creek edges as their preferred bedding cover often funnel past these trees on the go. Hedge apples could be your ticket to get them to pause for a shot. As a hot tip, these are also pot sweeteners for creek crossings.
  • Pokeberries. This is my favorite off-label food source. Pokeberry is not selective on where it grows, but disturbed ground that is later left untouched (like last year’s cut power line or the edges of old logging roads) is where pokeberry seems to thrive. It can be found in soggy patches of open woods where the sunlight invades the forest floor or in 1-4 year-old clear-cuts mixed in with new growth. Really, pokeberry is a garden weed. But fortunately for us, if the source is large enough, it will be a huge attractant early on in the season until about the middle of October. Pokeberry provides a perfect hideout for deer and is a great appetizer prior to a big night time meal.
  • Fern Bulbs. When ferns initially die off, they have a peculiar odor, and deer don’t appear to be to very interested in them. But when other mast or palatable weeds are gone, fern bulbs are usually a good stopping place for whitetails. The best way to find a preferred patch is a conscious observant effort during spring scouting missions. Deer will continue to root up big patches of ground throughout the year looking for bulbs. Drop a way point when you find one of these areas. No harm in setting up right over food like this, as bucks will spend a lot of time digging around.
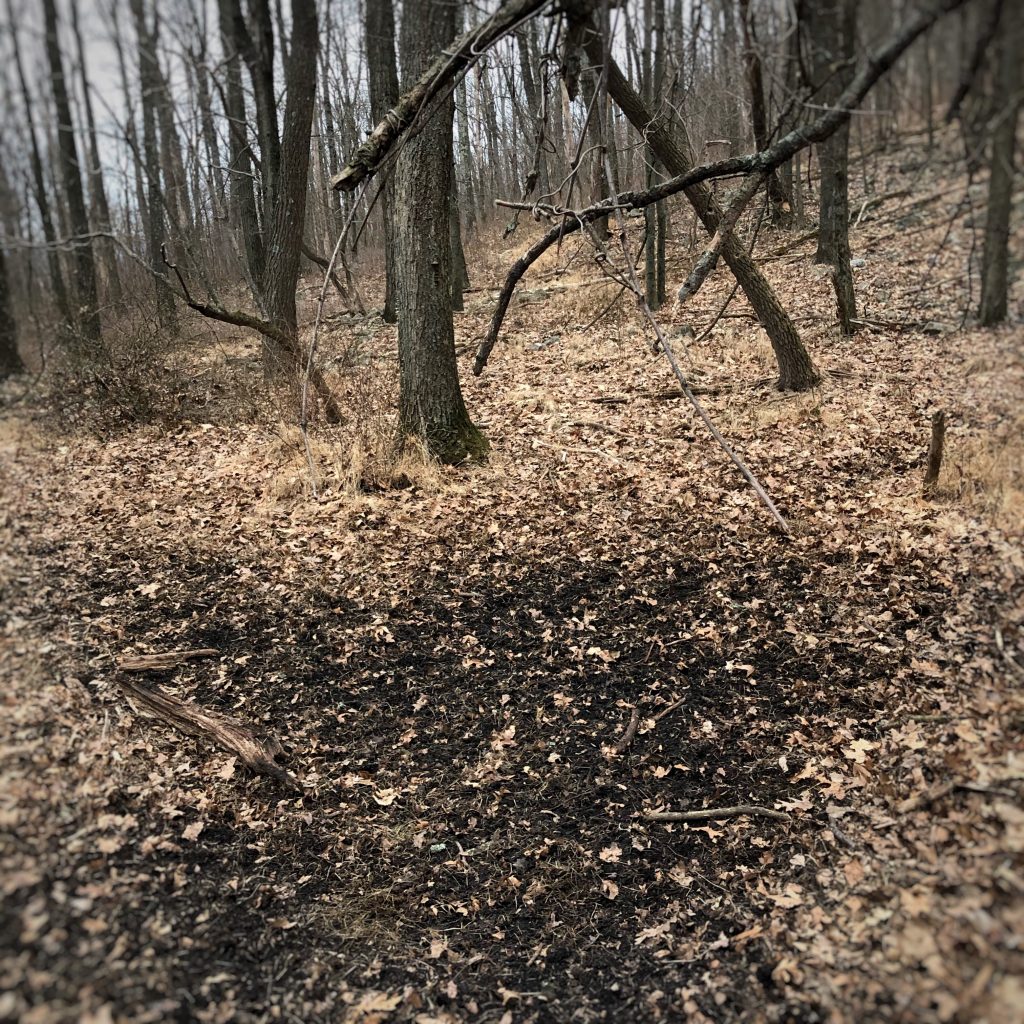
  • Maples Leaves. When the leaves just begin to change, deer eat them like kids in a candy store. While some of the maples might drop their sweet leaves, those leaves might get bitter before deer can get to them. Search for areas where controlled burns have taken place in the last year or two. Many burned areas like this could support new growth maple shoots. These are perfect, as they’re at eating height and deer can get their fill quickly with little effort. Pay attention to your access here; deer also like to bed directly in these new growth maples, and it can be hard to maintain an element of surprise.

Because of the rising popularity of bow hunting and the trending nature of micro tuning different styles, it can be very hard to find “overlooked” spots at this stage of the game. When you’re doing your scouting, don’t just go searching for overlooked food sources. Deer will eat almost anything if they feel safe in the area where they’re feeding. It’s more important to determine whether the area is safe and then what actually makes a deer to want spend time there. Work off of whatever information you gather afield. There are plenty of decisions to make, but when you’ve found something that looks like it will work, roll with it. You’ve got nothing to lose and a lot to gain.

Article

One Stick Climbing Method

One stick climbing has been all the rage the past few months. And rightly so, as more bowhunters are prioritizing being as mobile as possible. I took the plunge last year and have added one sticking to my saddle hunting repertoire. That said, it may or may not be best for all situations. In today’s video I go over my one sticking gear, and how/when I usually use this vs my two stick climbing method. Hope you dig the video and thanks for watching!

Article

How To Hunt Clearcuts

Funnels, Terrain, and Pinch-points for Hunting Clear-cuts.

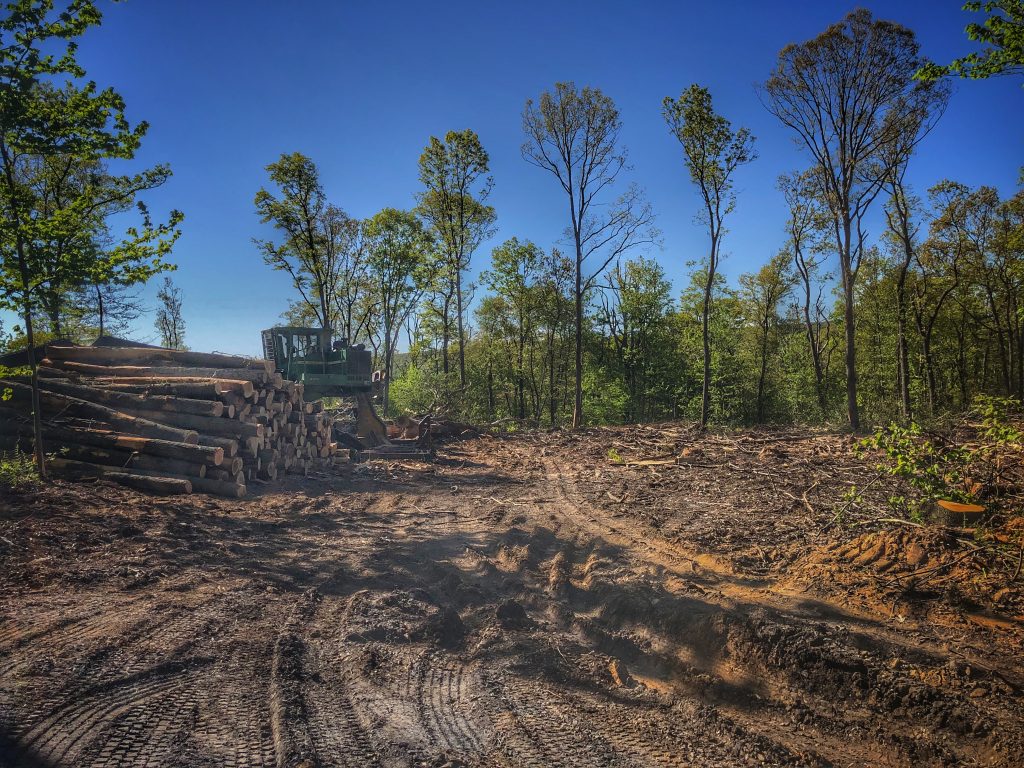
With temperatures 12-15 degrees cooler than what the thermometer had shown the previous few days, conditions on this mid-October morning were perfect, and I couldn’t be more excited to make my way into the deer woods. On our 3-mile hike, my hunting partner and I weren’t nearly as worn out and sweaty as we normally would have been—a collateral bonus granted by the chilled air. After we separated to make our way to our chosen trees, I picked my way with some effort through alanding area for felled logs. Next traveling down a long skiddertrail, I found myself in the midst of a 5-year-old clear-cut. Thecover was dense, but I had found that the skidder trail led to a few seed-producing trees. In the center of those trees, there was a pothole that consistently held water through dry periods of the year. I climbed a tree that I could barely get my arms around and settled in. Although I was relatively new to public land hunting, I knew this spot held promise. At the time I did not yet own a trail camera, but I could tell from sign that the spot was frequented by deer and figured bucks would stop at the watering hole to grab a drink in between chasing receptive does. I took a deep frosty breath and waited.

Clear-cuts are, for all intents and purposes, big woods food plots. Pound-for-pound, they supersede any amount of food produced by a mature forest. Deer use them for food, travel, bedding, socializing, escape, and pretty much any natural habit a deer exhibits. As far as terrain is concerned, deer use points, ridges, saddles and ditches the same way in a clear-cut as they would in a hardwoods setting. But clear-cuts have a few unique features that should be added to your hunt plan arsenal.

1. Ring Trail

As the name implies, a ring trail is a feature that circles the perimeter of a clear-cut. Not every cut will have a ring trail, or the trail may only parallel one side of the cut if a natural barriergets in the way. The idea is that the edge of the cut creates its own funnel that may not have previously been a preferred route.Ring trails play well into a hunting strategy during the peak scraping phase (last two weeks of October) and also during any phase that a buck might be seeking does. Bucks will cruise along the ring while scent checking the cut where does are most likelybedding. Set up to hunt ring trails where intersecting trails enter and exit the cut. If there’s a scrape at this junction, it will make the spot much sweeter for mid to late October hunting.

2. Log Landing Openings

Oftentimes, loggers create a landing area where packed ground makes harsh growing conditions for native plant species. Landing areas are usually put to use as parking lots if they’re along main access points. However, landing areas in clear-cuts,where parking lots aren’t needed, may be turned to mini food plots. These openings provide access into the edge of a cut and are a good attraction to the deer herd. They’re very attractive to other hunters as well, so weigh your options when it comes to hunting them. If it appears that other hunters are frequenting these landing areas, it’s better to the of these plots as a destination food source. With that in mind, Hunt the area of travel instead of directly over the plot.

3. Skidder Maze

Deer love traveling skidder trails(a man-made trail produced by logging equipment) because they provide the route of least resistance. The more dense the cover around the skidder tracks, the more the deer herd will utilize them. Via satellite imagery, a maze of skidder trails might look like a hand on a scarecrow. Where the arm of the scarecrow meets the hand and fingers, there’s often a wider open area that can be a very good spot for an archery setup. A 10-15- yard shot could be all that’s availablein a spot like this but, if that’s where the action is going to happen isn’t that where you want to be anyway? 

Plan to be as stealthy as possibly when it comes to navigatingskidder trails. Deer frequently use these tracks for bedding cover, so you’ll want to do your best to avoid spooking too many deer on your way in to the stand. If the track you’ve discovered is a primary bedding area, consider stalking your way to the stand in the moments of first light. You may even get a stalking shot on the way, if you’re careful enough.

4. Funnels Between the Cuts.

Again, deer prefer to use paths of least resistance, and movement through mature forested sections between clear-cutsis as easy as it gets. Timber that is left standing between cutscreates ideal travel corridors. The narrower the strip of timber,the better. If this funnel is a single row of trees through the middle of a cut, you’ll definitely want to have a dialed setup along that funnel. During your scouting missions, evaluate the density of the cover. Cover needs to provide securityconcealment for a mature buck or you may find the funnel to beused almost entirely by does and yearling bucks.

5. Islands.

Like swamps, clear-cuts can also have islands throughout their interior. These “islands” are clusters of mature trees left standing to provide seeds to reforest the logged area. Not all of theseseed-tree islands are worthwhile, but in the event there is some kind of mass crop, it’s a good bet that deer will congregate in them. The best islands will generally be a mix of white and red oaks. Add-in wild blue or black berries to the outside edges of the island and you’ve found yourself a spot that could be great hunting all season long.

6. Rotational Native Food

Clear-cuts are full of native food sources that come and go with the progression of the seasons. A season may begin with some kind of early season food source, like pokeberry, dominating the market. Next, sapling oaks or greenbriar take over as the most prevalent vegetation. Fern bulbs might close out the season.  Whatever the mass crop or browse of choice happens to be, there will be plenty of it surrounding every deer that lives in, or uses, that cut. Anticipating when and where the change in foodwill happen can put you in a honey hole more often than not.

7. Water Sources

The most reliable deer movement that can be found inside a clear-cut is movement that revolves around water. Spring-fed waterholes are my personal favorite, because they consistently produce enough water to remain attractive even during dry spells. Ditches and creeks winding through a cut are also valuable, especially if you can find a point deer use for crossing. If none of these water sources are present, look for deeply rutted tire tracks left by heavy machinery. These often will hold waterfor extended periods, especially if warm season grasses have an established root bed around the edges that retains surplus water. These areas tend to get a bit boggy but are great attractants for bedding cover as well as a water source.

 8. Old Clear-cuts

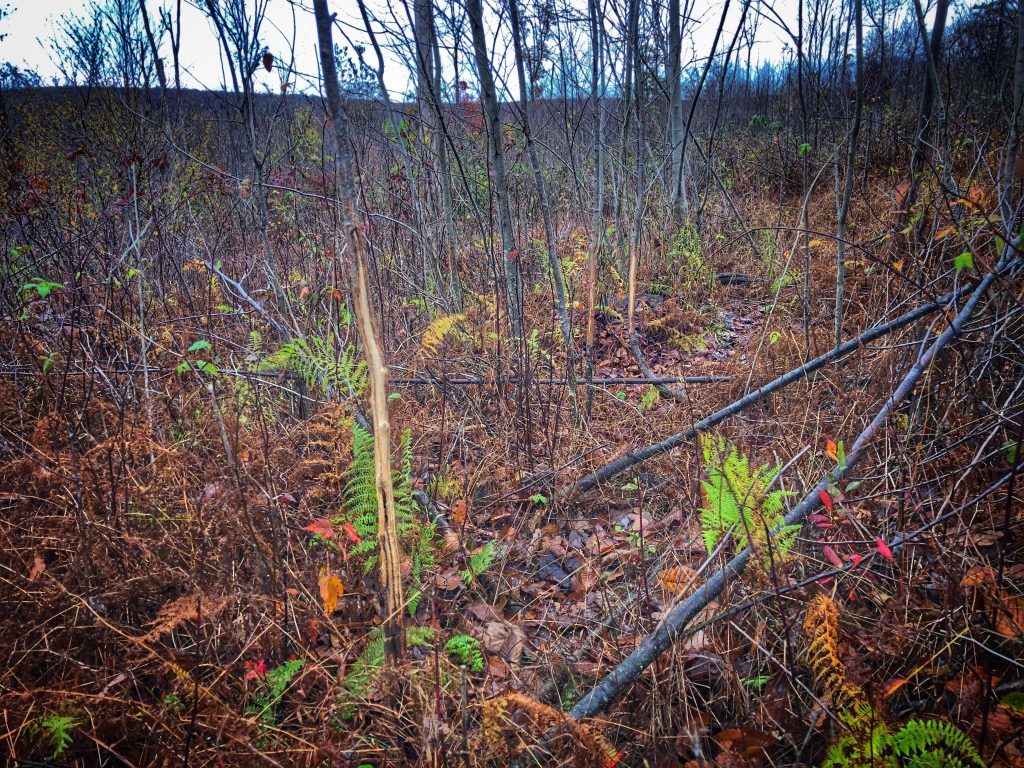
Old doesn’t necessarily mean bad. If you’ve been inside an old clear-cut, you know what I’m talking about. Old cuts look like a mass number of grey poles with an average of 5 inches in diameter with not many other plants in sight. Deer may not live in these old cuts the same way they live in a 3-8 year-old cut,but they still travel through them, they still use them as escape routes, and they still use their edges for travel and bedding. Don’t overlook old cuts during your spring scouting missions.

Conclusion

On that perfect October morning and my excitement rose with the sun. I had a tense moment watching a black bear drink out of the watering hole and then pass yards below my stand. Throughout the morning, I could hear deer walking just out of eyeshot. But after a few hours with no appearance by a pair of antlers, I sat back into my stand content on enjoying the scenery. Then I heard a grunt. I grunted back and was rewarded by an aggressive response of thrashing trees as a buck rubbed his antlers on saplings and headed in my direction. Soon, I could see the buck twisting his head from side-to-side as he made his way through the dense cover. He paused behind a laurel bush, a mere 10 yards away, for what seemed like forever. My heart was riding a rollercoaster.  Three more steps would take him to a mere 12 yards and expose his vitals. Finally, he took those steps, and I drew my bow.  My arrow met its mark. My first public land whitetail, and my biggest buck to date, didn’t make it 50 yards from the base of my tree. 

Article

Growing Pains of a DIY Bowhunter: Setting Goals & Expectations

In reference to whitetail deer hunting, goals and expectations are most often centered around two factors: antlers and meat. However, whether hunting public land, or even private properties, standards shouldn’t only be about trophies and food. Ultimately, the goal should be to determine how hunting can become a lifelong endeavor not just an activity to pass some time on a weekend.

No one searches for a new job expecting to make the same pay as the CEO of the company. In the same way, it’s important to create realistic personal goals and manage your expectations when it comes to bowhunting. This isn’t to say you won’t start enjoying yourself right out of the gate, but it might take some time to get to where you’d like to be, and that’s okay! DIY bowhunting is heavily garnished with opportunity for growth as a hunter, as well as personal growth in general. You’ll learn a lot about deer and hunting over a short amount of time. But really, you’ll learn more about yourself than you could have imagined.

Building hunting standards will include some fundamental factors. Before you can get to the real meat of the topic, consider your reason to hunt. Contemplate your motives, knowledge base, and logically your available time. Once sorted, decisions about your personal set of standards will be much easier.

Motive

What’s driving your desire to hunt? Pure motivation to kill a big buck could land you with a new hobby in less than one season. However, starting your hunting career in the big buck trap could more realistically lead to a big flop. Nothing is worse than a broadside 4 ½ year old buck at 20 yards while your nerves are melting. Never having been in highly intense hunting situations could lead to some game-time failure. It doesn’t matter who you talk to about hunting. If they love it enough, nerves have probably gotten the better of them too! Honestly, killing a trophy buck isn’t always as easy as hunting shows make it seem. If you expect to kill a monster in your first season, you could be very disappointed. Take some time to consider your ultimate motive. Does that motive need to be re-evaluated? Maybe there should be less pressure to kill, more emphasis on learning deer, and just having a good time in the outdoors. Maybe there should be more emphasis on filling the freezer. Your grill won’t discriminate—any deer will do.

Knowledge

Ever watch a singing competition show? If you have, I’m sure you’ve wondered who in the world told the auditioning singer that they could actually hold a tune. Some of those people either never took the time to listen to themselves, or someone lied to them and told them they were great. Not many people are excellent hunters right out of the gate. Don’t be discouraged if you suck initially! Unlike a terrific singing voice, hunting is a skill you can acquire, provided you’re willing to put in the time and effort. Today there’s more information and content related to hunting than anyone could consume in an entire lifetime. Learning methods have definitely advanced, even in the last 5 years. But woodsmanship skills can’t all be perfected by watching a YouTube video. All that content is helpful, but skills are best learned and honed hands-on. Take, for example, one of the hottest present styles of hunting—hunting specific buck beds. If you think you’re going to sneak into position successfully, having no experience moving with methodic, stealthy intent, you’re gravely mistaken. While a newbie could really dig in and learn all the information they could ever want to about how to approach this style of hunting, there is no substitute for getting out in the woods and actually doing it. Most importantly, be patient with yourself, have awareness of your own skillset, and don’t be afraid to learn through a little trial and error.

Time Balance

Learning to kill a big buck is a huge investment of time and energy. Of course, about 10% of hunting is luck. The remaining 90% relies on scouting efforts and actual time spent hunting. If a 100” buck would make you happy, let it fly. Personally, I used to care too much about what other people thought. I’ve come to learn that that puts a damper on my own hunting goals. Since that recognition, I’ve enjoyed my invested time in the woods much more.  

Remembering your family when the season begins to cloud your mind is very important. If you alienate your family over deer, that will lead to a pretty crap life. Speaking from experience, the huge honey do list that you finished in summertime is only going to go so far. The best thing to do is actually pretty simple. Set aside a bit of time to seriously be present with your spouse and kids. 3 or 4 hours of pure quality time with your family on a regular basis throughout the hunting season will go a long way. Set aside that time whether it be once or week or even every other. During peak hunting season, even short amounts of quality time go way further than the new patio that you installed a few months ago. Got kids that are even remotely interested in hunting? Take them with you! Of course, that might not be a hunt to expect Booners, but it will be time well invested.

Expectations

The bar for what a hunter could expect from public land used to be set very low. Recently, that’s changed. Public land is the hot topic in hunting media and among many groups of hunters. Reality is this: public land hunting hasn’t changed much. Sure, there is much better management of our public spaces, but public land is still an even-odds arena. Some public land is more pressured than others. That may seem pretty obvious, but my point is: if you’re looking for the same bruiser buck that may be found on less pressured properties, you may be setting yourself up for failure. I’m not saying to go out and shoot the first buck that walks inside of bow range. I’m just saying, if the chosen property has an overall buck population of 2½ -year-old deer, you’re probably going to burn yourself out waiting for a 5-year-old to walk by. Move on to a new spot or decide to lower your standards to the level of what the property has to offer.

Goals

Goals are synonymous with expectations when it comes to public land hunting. When choosing goals, don’t make it just about the size of the buck you’re after. Make it about the challenge you’re about to face head-on. Maybe it will be your first time packing a deer out of the big woods or your first out-of-state hunt. Do something to change the way you perceive hunting. I promise, antler size will matter a lot less, even on a buck you would never dream of arrowing on a pristinely managed property. I love big antlers and cool trail camera pictures just as much as the next guy. And, believe me, I strive to aim for big bucks too. But, more than anything, I just love to hunt.

Article

Choosing an Area to Hunt — Public Land & Sign Breakdown

Hunting is full of challenges. Anyone who has ever picked up a bow or rifle and headed to the woods for an extended period is likely no stranger to extreme temperatures, rough terrain, bugs, boredom, and a pile of other discomforts. But for many, the challenges experienced in the field are small compared to those triggered by the process of planning. The purpose of this article is to help make that process a little less painful.

Embarking, or transitioning, to utilization of public land can be confusing when trying to determine where hunting is and is not permitted. For our Pennsylvania readers, it’s important to know the differences in types of public land in your area. Consider, each type of public land likely has its own set of regulations. Specific regulations are usually posted on-site or can be found on state agency websites. But all together, Pennsylvania has a vast amount of public land available to anyone. Fortunately, with mapping systems like OnX, struggling to find pieces in that vast expanse are minimal. There are approximately four million acres available for roaming in Pennsylvania, and believe me, they’re worth exploring!

In this read, we will touch on types of public land, e-scouting basics, and boots-on-the-ground scouting strategies. All these tools are useful when choosing an area to hunt.

Public Land Descriptions

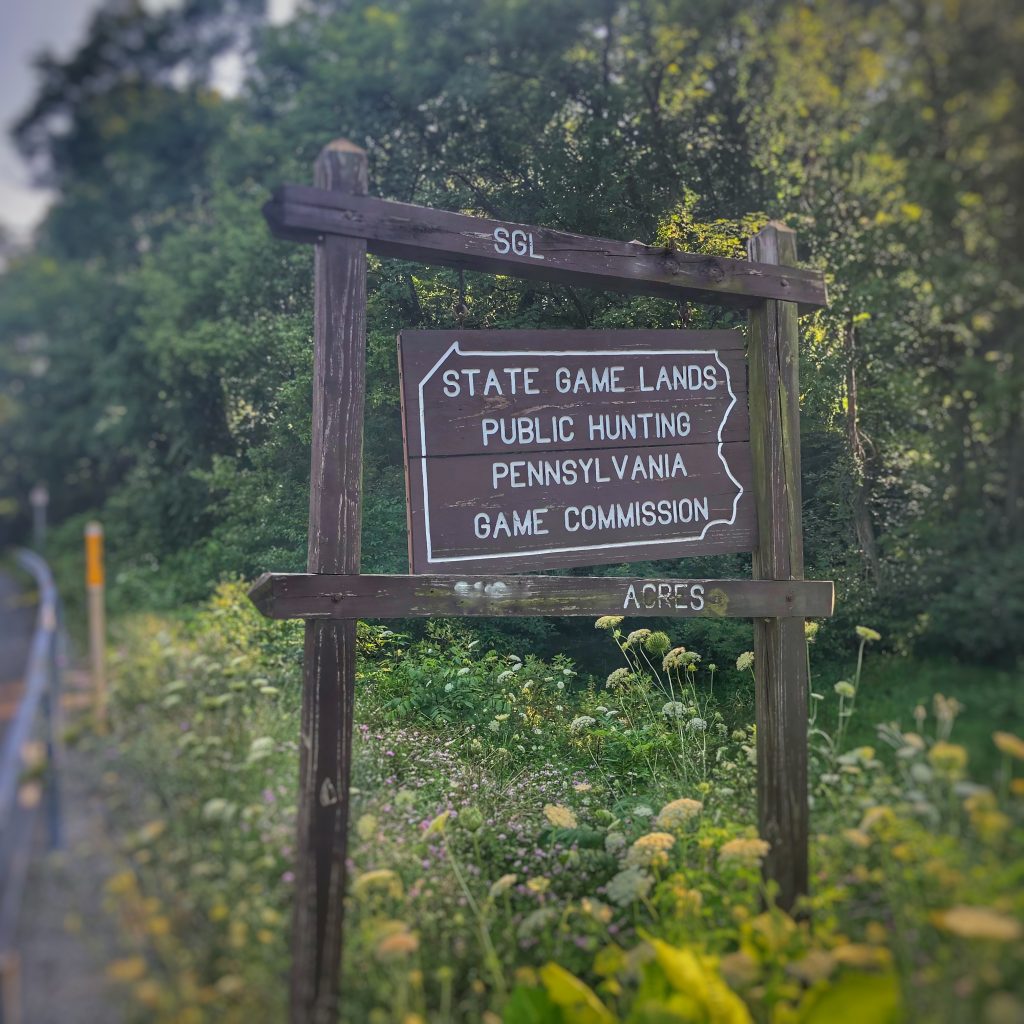
State game lands (SGL). SGL properties are lands owned and operated by the Pennsylvania Game Commission (PGC). These lands are the most popular places to hunt due to their widespread nature and the large amount of habitat improvements made by the PGC. (Check out information on SGLs via the PGC’s website here: PGC’s interactive mapping.)  Many SGLs are easily accessible. Occasionally, that creates higher hunting competition, but they can still be excellent if you’re willing to do some research. A program linked to SGLs, that all beginner hunters should be aware of, is the Deer Hunter Focus Program (see Deer Hunter Focus Area). This program highlights areas where it might benefit a deer hunter to focus their efforts. Although difficult to hunt during gun seasons, or during rut, due to hunting pressure, focus areas are great places to acquire deer hunting skills.

State Forests. State Forests are lands that are managed and owned by the state. These properties allow more recreational activities like camping. Some even have ATV/ snowmobile trails through their interior. Pennsylvania boasts many large, seemingly endless tracts, of wooded state forests. They will not generally have planted food sources, so you’ll want to scour satellite images for new timber harvests. It’s in timbered areas where you will find the most concentrated deer populations.   

United States Army Corps of Engineers Properties. As their name implies, corps properties are federally owned and managed by the US military. Because these properties are based around water control efforts, they often offer great hunting and fishing opportunities. Additionally, you’ll find a moderate amount of non-hunting recreation on these public spaces.

E-Scouting

E-scouting is the best way to be productive from the comfort of your couch. Today, hunting-based GPS mapping, make paper maps and word of mouth a minor necessity. For detailed info about jargon used to describe terrain features and pinch points, check out  Mapping Trophy Bucks by Brad Herndon.

Terrain. Terrain is what we talk about when hunting a specific land feature (i.e., points, draws, ditches, saddles, etc.). Once you’ve learned basic map reading, understanding terrain and contour lines is easy. The best way to learn is to do. Find some crazy-looking contour lines on the map, then go take a hike for a hands-on look.  Oftentimes, you’ll find something unexpected; you might even have fun in the process. If the feature is obscure on the map, but seems like a gem in person, it probably is!

Food. Some food sources, like crop fields and food plots, are easy to find via satellite imagery. Other food sources, like new growth, burns, and oak forests, can be found via state agency websites; such as  PGC’s interactive mapping.  Other habitat improvements can be found via OnX hunt-maps app by utilizing hunt layers available for timber harvests, burns, and wilderness areas. Obvious food sources can be a good steppingstone to begin understanding deer behavior at a higher frequency. If the immediate goal isn’t to harvest a giant buck, there should also be ample opportunities for hunting around these types of food sources. Clear cuts are another great food source, and, believe me, they draw deer like frogs to water. There are so many strategies to hunting clear cuts, and we will go over them in a later article.

Water. Using plain topo imagery, water sources are very obvious. Some of those could have hunting potential, especially if they intertwine with terrain, which can pinch deer down. It’s even better if the terrain creates a funnel causing deer to cross water at a specific point, like a beaver dam or shallow creek crossing. Believe it or not, less obvious water is better. Obscure water sources may come in the form of a washed-out roadway with a lot of potholes, new clear cuts where springs might have opened, or tire tread marks that are holding water consistently. It’s important to check as many water sources as possible and then establish a pattern for how deer use those sources.

Boots-on-the-ground and Deer Sign

Let’s say you’ve found terrain that looks awesome on satellite imagery. Sometimes, during your boots-on-the-ground scouting efforts, images pan out to be exactly what was expected, but 90% of the time it’s nothing like what was imagined. That awesome-looking saddle could be one giant pile of boulders, or maybe it’s old growth timber that deer are less likely to pass through during daylight.

Putting boots on the ground

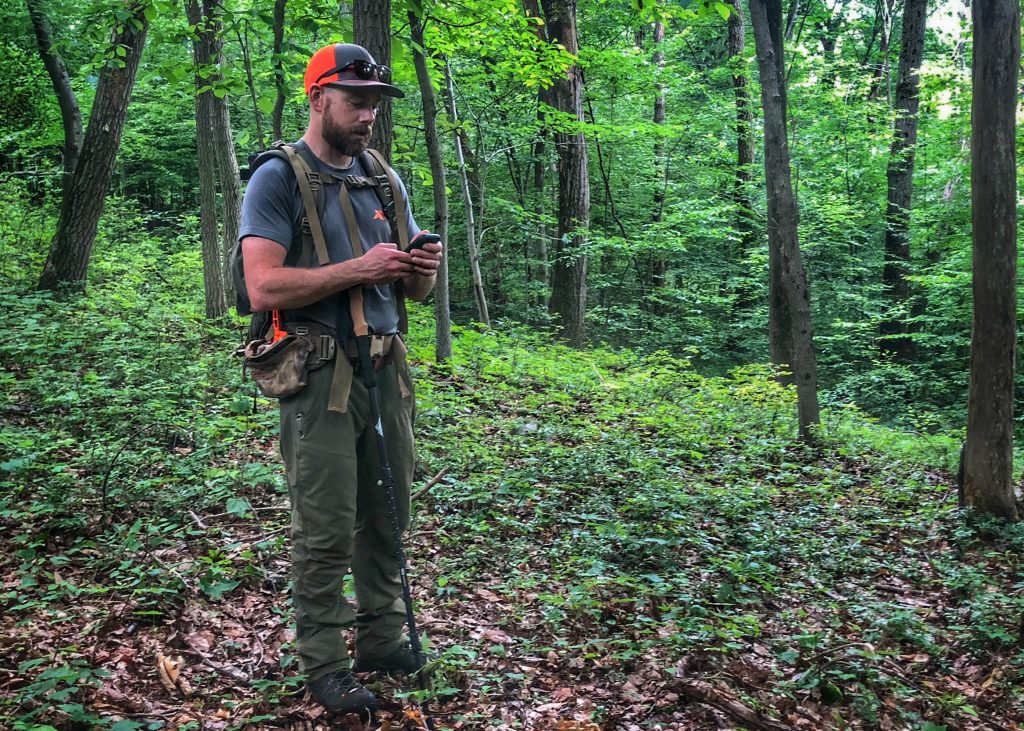
There is no replacement for boots-on-the- ground scouting when attempting to link terrain, imagery, and deer sign. Putting your eyes on the physical evidence a deer has left behind and piecing together how that same deer will make more sign is a hunter’s top investment. Whole articles could be written about each element of sign left behind by a deer, but for now the basics and small tips on how to use each are what we’ll focus on.

Tracks, Trails, and Scat.

These three pieces of sign almost always accompany each other. Trails are made by deer on a pattern. Some trails are so well used that they are pounded into the dirt like little highways. Depending on the type of cover a pounded trail is in, this is likely a good spot to set an ambush. Take a look at the size of the tracks and scat. This will help determine the age-class or size of deer that are using the trail consistently. If this spot is paying off for you, watch out for a time when bigger tracks than normal appear on the trail. It may give you tell-tail signs that a big buck has started to check for receptive does in the area.

Scrapes.

When it comes to deer sign, scrapes are a favorite topic of discussion. There are many differing strategies on how scrapes should be hunted but, understanding why scrapes are important to a deer herd isn’t an opinion. Scrapes are bare patches of dirt that a buck has pawed into the ground. They’re accompanied by a licking branch, which is some type of vegetation that hangs over the bare patch. Deer pee in the scrape and rub the licking branch with their face and/or antlers. Essentially, a scrape is a deer herd’s communication connection. Scrape use ramps up a short time prior to the rut as bucks begin their search for hot does. Activity tapers off during the height of the rut. All scrapes are not created equal! That’s your job during your boots-on-the-ground missions. The questions you need to answer about scrapes are these: Is the cover substantial enough to make a buck feel safe during daylight? Do the scrapes form a pattern or a line? Are the scrapes littered all over the place like a buck is testing the waters, or are there just a few that seem to serve a specific purpose? In my opinion, here are the two best areas to look for when it comes to hunting over scrapes:

  1. An area that bucks begin scrape making activity first year after year, rather than just one specific scrape. Scrapes like this are often in “staging areas” that bucks use before entering a vulnerable food source. They can found best by knowing historical data from that area and then scouting in-season. When the first scrapes open, get to the race quick!
  2. Established scrapes in substantial cover that serve as year-round communication. These scrapes are often part of a pattern, and trail cams should confirm year-round use. Every attractive element added to that scrape increases its value. If the scrape is in cover, is part of a pattern, maybe has an obscure water source, and close by food, I’d say you have a winner. Add a secondary escape route exiting the area and you’ll really be in the money!
Example of a great scrape with licking branches

Rubs.

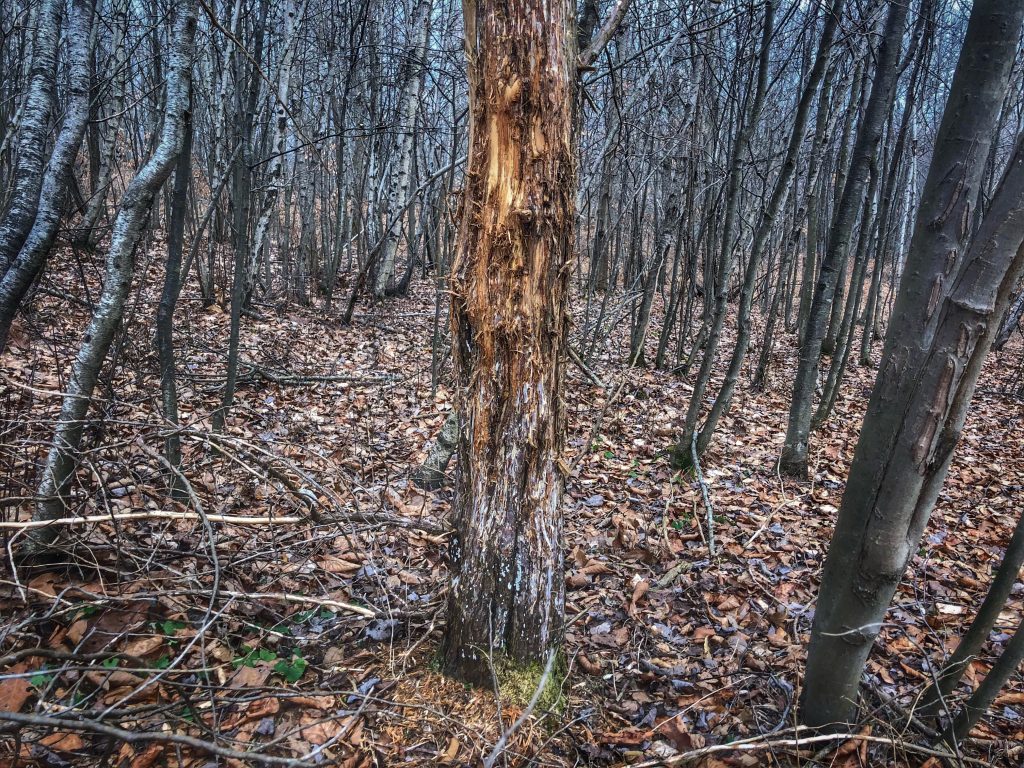
Rubs can be take-it-or-leave-it, but they are by far my favorite kind of sign to find. Rubs are sign bucks make by rubbing the bark off small to medium sized trees. There are a lot of opinions on the maturity of the buck that made the rub. Truthfully, no one really knows the right answer. Some people have seen spike bucks rub on trees 10 inches in diameter. Conversely, 160-inch bucks are known to rub small saplings. Of course, diameter is helpful, as is how aggressively the rub appears to have been made and the height of the rub (the taller the better). These clues could help with determining the maturity of a buck, but they aren’t fool proof. Like scrapes, rubs make a few patterns. Tight clustered rubs often indicate proximity to buck bedding. Rub lines may indicate preferred travel routes of bucks in the area. Rub lines are best found by in-season scouting and are worth hunting if they are fresh, or even better, if there are old rubs mixed into the new rub pattern. Your job will be to interpret the rub pattern and hunt that pattern accordingly. That’s tricky at times, but don’t over think the facts. Rub lines leading from an area that appears to be used for bedding to a food source is probably just that. Patterns that parallel a ridge line, without a specific destination, have potential to be rut travel corridors. You get the idea!

Hammer rub!

Beds.

Buck beds are all the rage in today’s hunting world. Everybody seems to be emphasizing the value of hunting in bedding areas. And sure, it’s a solid method if you learn how to nail it down. Finding beds in swamps and hill country is almost like the directions to a connect-the-dots picture. It’s so cool to walk to the end of a brushy ridge point or into a patch of cattails and understand exactly where to find a buck bed. The difficultly that lies in bed hunting is knowing the right timing. What wind works best? When is the buck actually using the bed? These are things that come with trial and error. I’ve found hunting specific beds to be worthwhile, but it’s far from a fool-proof method for every hunter. Occasionally, the action is reduced since you’ll be hunting a very specific and intricate piece of sign. This method is geared to finding one specific deer and is usually not a central location for deer traffic. You could sit for days without seeing a deer, so this method does require a superb amount of patience. But, believe me, it can pay off!

Next Up

We will go over goal setting and expectations for the DIY bowhunter.

Article

Growing Pains of a DIY Bowhunter: The Start Up — Compiling Important Gear and Elements

Old Yeller was my favorite childhood movie. To say I watched it constantly would be an understatement. There’s a scene in the movie that finds the older brother riding his mule into the woods with his father’s musket. He ties the mule to a tree and walks a few steps to sit on fallen log. Not long into his hunt, he begins watching animals romping around, but then his attention shifts to a thicket. He becomes excited when he catches a glimpse of a deer coming into the open. Raising his gun to shooting position, he immediately puts it back down when a doe and fawn emerge. But the doe and fawn are soon followed a sizable buck. The butt of the musket finds its place on his shoulder, the bullet finds its place in the buck’s vitals, and the boy proudly packs out his trophy on his mule’s back.

If only every hunt was that easy. As our experienced readers know, a scenario like that is almost pure fantasy—at least in the 21st century. Inaugural research into bowhunting, general information, gear, and legalities can be overwhelming. Fortunately, there are many states that offer mentorship programs. This type of program matches new hunters with experienced hunters who can teach the newbies a thing or two about hunting. Programs like this do well creating hunters that keep coming back for more year after year. Check for programs like this in your area to get on the fast track. (Click HERE for mentor opportunities in PA ). All that to say, becoming a proficient hunter isn’t an impossible self-taught undertaking. If DIY projects are something you excel at, hunting research shouldn’t cause much intimidation. Bowhunting is more involved than a stick and string, but it’s about the most fun that can be found in the woods.

Let’s outline a few things that you’ll need to get started. None of these elements need to be completed in any particular order. However, it goes without saying that the legal requirements that I mention are absolute necessities.

Legalities and Such

A hunter’s safety course

I’ve haven’t researched hunting laws for every state, but I’ve never heard of a state that doesn’t require a hunter education and safety course. Honestly, legality aside, with no experience under your belt, this is a good course to take. Not only will it keep yourself and other people around you safe, there’s actually a few basic skills that can be learned during a hunter’s ed class. Topics such as learning what kind of sign to look for, or what kind of shots are ethical or not, don’t seem like a big deal. But they will most definitely make all the difference when it comes to putting your quarry in the back of your truck or not.

Licensing

Hunting licenses are an annual requirement in every state. The structure of hunting license requirements will vary from state to state. Here, I highlight Pennsylvania’s licensing system, since that’s the one I know the best.

When buying a hunting license, whether online or in-person, keep in mind that a general license won’t cover all types of hunting.

PA’s system goes like this:

  • General hunting license = valid antlered (buck) deer tag for the General Firearms Season (any weapon may be used during this season). A regular license also comes with a valid spring and fall turkey tag with attached small game privileges (minus pheasants).
  • Antlerless deer license = lottery system for antlerless deer tags.
  • Archery license = privileges to hunt deer with archery equipment during Pennsylvania’s archery seasons.
  • Muzzleloader license = privileges to hunt during muzzleloader seasons.
  • Bear license = privileges to hunt bear during any open bear seasons with the appropriate weapon.
  • Furbearer license = privileges to trap or hunt fur bearing species (bobcats, fishers, fox, raccoon, etc.)
  • Pheasant stamp = privileges to hunt pheasants.
  • Migratory bird license = needed for all migratory birds. For waterfowl, a duck stamp is also required.

I’ve covered most bases here, but this list is to get your wheels turning on ensuring proper licensure. There are plenty of other ad-ons to consider, but Pennsylvania’s system is fairly easy to understand. Other states can be a bit more complicated and might require more digging.

Regulations

Across the board, regulations can be difficult to interpret. Some are straight forward but there are many that leave room for the imagination. I recall getting a live-from-the-field text from a friend of mine. He was bowhunting in light rain, on public land, when a studly black bear had made its way to 15 yards below his perch. Excited, my buddy told me he was watching the bear for the last 20 minutes and it had just moved out of range. I asked him if he had a bear tag, and since his answer was “yes of course,” I asked why he hadn’t shot the bear. The area he was hunting had an earlier bear season than the rest of the state, a fact he had not been aware of. Knowing his oversight made watching the bear disappear into the timber, unscathed, all the more painful.

An easy remedy to avoid missing hunting regulations is to read your book. Doing this in sections is easier than trying to memorize the entire book. Start by reading the general hunting regulations, then move on to animal-specific regulations. After that, break your study down by season dates and shooting times. This will do well in ensuring you’re staying legal while afield. A well-rounded knowledge of regs is really what you’ll need. For example, some states may allow tree stands to be hung in advance of a hunt; others do not. Most states do not allow any “harming” of vegetation, so trimming shooting lanes is illegal. Weapons always need to meet specific criteria; in Pennsylvania, vertical bows must have a draw weight of 35 lbs or higher and broadheads must meet a specific measurement range of 7/8 inch to no larger than 3 ¼  inches. That’s pretty much a no-brainer as far as broadheads are concerned, but if you didn’t know it, it could mean trouble.

Basic and Necessary Gear

A weapon of choice

This article focuses on bowhunting, but firearms are a valid option for many people as well. Some would argue that firearms are more ethical than archery tackle and that the average Joe can achieve accuracy at a higher level. I’m not sure the ethical dilemma is true or false. Bowhunters are like fly fisherman— there tend to be more purists that have a different set of ethical standards. Sorry gun fanatics! For the record, I own one, I shoot one, I hunt with one, and I enjoy firearms seasons. Despite that, I’d much rather be in the woods with a bow in my hand.

For those who are looking into the bowhunting experience, check out Clint’s latest video on YouTube!  Best Bow Reviews

This is by far the best way to choose a bow. Get to an archery pro shop, give them your budget, and shoot a few arrows with the bows that catch your eye. Good pro shops will help you with understanding things like draw length and will usually give you a few shooting tips.

Day Pack

Honestly, day packs aren’t always a 100% necessity. If hunting close to home, a weapon, ammo or arrows, license, appropriate attire, and a knife are really all you would need. However, day packs can build a more enjoyable hunt. Make a minimal list for your pack, including items that will always be stocked. That makes it easier to grab and go rather than trying to collect things in a rush or early in the morning before your first cup of coffee. Here are a few things you should bring: a small pair of binos, field dressing knife (changeable blade knives rule here), licenses, extra ammo if you’re gun hunting, snacks, water, rangefinder, dry socks, release for bowhunters, gear hoist rope, bow hanger (non-screw in for public land hunters), gloves, and latex gloves for field dressing. If you’re planning to pack an animal out of the woods you’ll want a heavy-duty pack, plus game bags to hold meat. The further the hike, the more you’ll want to tailor your pack to the challenge.

If you’re concerned about scent at this stage of your hunting career, I would advise keeping all your clothes in a scent tote. Do a quick check of that tote before leaving the house. I’ve been hunting for 20 years and I still forget things. Once, I wore boat shoes to drive to my destination. When I got there, I realized I never packed my hunting boots. I’m fortunate to have some good hunting buddies that I can call on when needed. This particular buddy didn’t even have a reason to be up that early in the morning. But he lived close by and willingly brought me a pair of boots. Good thing too, because I likely wouldn’t have sat long enough to kill the 11-pt buck I killed that morning.

Elevated Hunting Options

For new hunters that aren’t stoked about climbing a tree, you should feel free to ground hunt without judgement. It can be more challenging when compared to hunting in an elevated position, but it’s doable. Try it out until you become more comfortable in the woods. For those that are ready to get straight into a tree, there are tons of options to consider:

  • Ladder stand. Best for private land, as this is a lock-into-place-and-leave-it-there type of stand.
  • Climbing stand. This isn’t a bad option for mobile hunters. It’s a pack-it-in-pack-it-out style of tree stand. If someone is going to give you one, go for it. But they have a good number of disadvantages, such as noise and limiting tree choice to straight, branchless trees.
  • Hang on tree stand and sticks. This stand swept the mobile market for quite some time thanks to fellas like Dan Infalt. For good reason, too. They are much quieter than climbing stands. Also, they provide more options for tree choices compared to climbing stands. Their downfall is that they are a little cumbersome compared to the more recent competition.
  • Saddles. Saddles are currently sweeping the deck. They’ve been around for quite some time but have recently picked up steam in the DIY, mobile hunter world. They bring a new meaning to “light weight” and create more shot options. I’m new to the saddle hunting crew, but Clint can attest that Tethrd saddles lead the way in mobile hunting innovation.

Clothing

The newest camouflage clothing on the market isn’t 100% necessary if it’s beyond your budget. While specialized clothing may be tailored for specific times in the field, and may help you sit longer, army surplus clothing will work well in a pinch. Olive colors, tans, browns, greys, and most military camo patterns will do just fine to start. Layering works best to stay cool or warm when it matters most.

Conclusion

Next up, we will focus on choosing an area to hunt. We will touch on types of public land, what to look for during boots-on-the-ground missions, e-scouting, and reading deer sign.

Article

Becoming a DIY Bowhunter: Part One – The Beginnings

For as long as I can remember, bowhunting has had a special place in my life. When I was a young kid, my dad would take me to the top of the hill in our back yard to sit in on his shooting sessions. I can still see the DIY target he made using 2x4s and layered cardboard—not exactly pretty to look at, but it served its purpose. The 31” aluminum arrows he shot from his custom-made compound bow flew like slow pitched soft balls. I was twelve years old when he took me on my first bow hunt and I remember the experience of it vividly—sitting along a field edge next to a big red oak, with high hopes of seeing any kind of deer. That evening’s first sighting of a deer, with a weapon in my hand, was an experience that brought on a feeling that would become familiar to me. It’s a feeling so many hunters know—knees shaking, hands quivering, and heart racing. Familiar though it may be, it never, ever gets old. This overwhelming feeling is what keeps so many coming back to the woods.

It’s no secret that Pennsylvania is deeply rooted in hunting traditions. Some of those traditions have faded or changed in recent years. While change can be good, we need to do our part to build new hunters and revitalize dwindling public interest.

Possibly the hottest thing in the bowhunting world right now is the DIY style-hunt. There are tons of YouTube channels, podcasts, and social media accounts where anyone can consume content. While some of the content may need to be sorted in order to find the best stuff, much of it is solid information.

I totally understand the hype. The overall message of this content is that anyone can do it. And the reality is that, yes, anyone can do it: but it will come with its own set of challenges. Diving straight into any kind of bowhunting can be intimidating for anyone, even people who already have other types of hunting experiences under their belt. Being prepared for challenges as they come will help reduce the frustrations they so often create.

Knowing where to start and even what questions to ask can cause people to quit before they even get started. Where should I hunt? Where can I hunt? What should I wear? What weapon should I use? How do I be stealthy? How do I find a deer? How do I take care of the meat? What’s the best way to fill my freezer? Is a big buck worth waiting for? What kind of legal things do I need to know? The questions are endless and can be overwhelming. Don’t let that stop you. Do your homework. Take advantage of the helpful content at your fingertips, and like any new thing, take it one step at a time.

That may seem a little too preachy for some readers, but I’ll take it even further: if you’re that person that has been wanting to give hunting a try, don’t stop at the thought! There is truly an innate drive we have as humans towards hunting. Following that lifestyle can lead to extreme satisfaction, not to mention fun!

Truthfully, Pennsylvania has some of the most grueling, intensive, backbreaking hunting anyone can find. But with time and hard work, the rewards far exceed the effort. Starting with the right mindset and expecting to put in time, will ensure that you never feel that you’ve lost a second in the woods. Personally, I’ve never felt that I’ve wasted,  even a second, if that time was spent bowhunting.

With this series of articles, I’ll be addressing the growing pains that come with being a DIY bowhunter. I’ll do my best to answer some of the tougher questions that arise when first starting out. Look out for topics that cater to the new crowd, all the way to up to topics with a more advanced perspective. My hope is that from reading these articles, you will be able to start on the road to a long and healthy relationship with bowhunting.

Look out for upcoming topics:

  • Where to begin: We will touch on common legal requirements, basic and minimal gear advice, tools/techniques to extract an animal from the field, and meat care.
  • Choosing an area to Hunt: Understanding types of public lands, e-scouting, pinch points, and terrain features.
  • Setting hunting goals: Matching reality and skill set.
  • Choosing the right time to upgrade gear: Beginners gear to advanced. What’s the difference and what should you carry?
  • Balancing life and hunting: Dividing time for family, work, and hunting.
  • Consuming hunting media and content: What content is worth your while and how to apply that content to the real world.
  • Hunting mindset: Staying positive, get something out of hunting excursion, recovering from near misses and actual ones.

Follow Aaron on Instagram @aaron_hepler

Article

Best Hunting Bow Review | 2021

In today’s video I’m shooting, reviewing and comparing a flagship bow from Prime, Bowtech, Elite, and Mathews. By the end I’ll let you know which bow I’d purchase…or if I’d keep my current bow. I’m not sponsored by any bow manufacturers and am a normal guy evaluating these bows based on what I prefer for hunting purposes only. Hope you all dig it!

Article

Turning A Prusik Knot Into An Ascender For 10 Cents

Using a Ropeman 1 or Kong Duck can make using a lineman’s rope much easier and convenient. Especially when climbing in and out of your hunting saddle or mobile stand in the dark. But is that convenience worth $40 to $60 dollars, the cost of an ascender? What if you could get the convenient use of an ascender using the prusik knot that came with your lineman’s rope by adding 10 cents worth of 550 paracord? That’s what I’ll show you in this video. We’re going to turn your prusik knot into a fancy ascender for 10 cents.